![]()

How To Create A Newsletter Subscription Form & Add It To WordPress
In my last tutorials, I showed you how to sign up for a free email marketing account with Aweber and then I showed you how to create a thank you page so that your subscribers are sent to a well-designed and functional thank you page when they subscribe to your newsletter.
In this tutorial, I will show you how to create your newsletter subscription form. I will also show you how to add the subscription form to your website.
However, before we begin, I quickly want to tell you about the two different subscription forms you can get: double opt-in versus single opt-in subscription forms. Knowing the difference between the two, and choosing the right one for your business, will make a big difference to your email marketing campaigns.
Double Opt-In Vs Single Opt-In Subscription Forms
If you want to make the most out of email marketing you need to make sure that you have a high-quality email list with subscribers who are genuinely interested in what you have to offer – This is where double opt-in and single opt-in subscription forms come into play.
Single Opt-In
When you use a single opt-in subscription form, it means that people can sign up for your newsletter simply by submitting their email addresses. They are immediately added to your mailing list without needing to confirm their email address.
Advantages of Single Opt-in
Quick & Easy
A single opt-in subscription form lets your website visitors sign up for your newsletter super quickly. And because they don’t have to check their email and confirm their email address, you will have a higher conversion rate.
Bigger Email List
Because it is so easy to sign up with a single opt-in form, you will find that you will have lots of subscribers! Sounds great, but it does come with some clear disadvantages.
Disadvantages Of Single Opt-In
Low-Quality Email List
Just because you have lots of email addresses in your email list, doesn’t mean that your contacts are high-quality contacts.
Because it is so easy to sign up with a single opt-in form you will find that there are lots of invalid or even fake email addresses that are added to your list which means that lots of your emails won’t be delivered, and if they are delivered, people might not bother to open them.
Spam
When it is so easy to sign up to your mailing list, many people simply just won’t remember signing up! So, when you send out your newsletters, there is a really good chance that they will immediately unsubscribe or even worse, report your emails as spam.
Double Opt-In
If you decide to use a double opt-in subscription form on your site, then it means that your subscribers will need to confirm their email addresses before they are added to your mailing list.
There are usually two steps involved: the first is when the visitor completes your sign-up form and the second is when the user needs to visit their own email to check for a confirmation message from you. They then need to click on a link or a button in the email to confirm that they are happy to receive your emails.
This is a very common subscription method that most businesses use today and I’m sure you come across this type of opt-in very often.
Advantages of Double Opt-In
High-Quality Email List
Because subscribers have to confirm their email addresses before being added to your mailing list, there is a far higher chance that only genuine subscribers will sign up.
Also, because confirmation is needed, if people make a mistake in their email address it will never be confirmed so you will cut down on having invalid email addresses in your list. And of course, because each email address is confirmed before being added to your list, there is a very high chance that it will be delivered correctly when you start sending out your newsletters.
Improved Engagement With Your Subscribers
Because subscribers have actively confirmed their email addresses they are also far more likely to open and show an interest in your newsletters and the content that you offer. This is exactly what you want – high-quality subscribers!
Disadvantages of Double Opt-In:
Lower Conversion Rates
Because subscribers need to take an extra step by confirming their email addresses, this often leads to a lower conversion rate when compared to a single opt-in form. So, if you are including any type of special or freebie for people who subscribe to your newsletter, it is important to wait for them to confirm their subscription before sending them the promised item.
More Effort To Sign Up
When signing up for a double opt-in newsletter it does take longer and some visitors might lose interest or even forget to confirm their subscriptions. This is normal for a double opt-in list. However, it also means that when someone does sign up and complete the double opt-in process they are usually happy to be on your list.
By default, Aweber’s opt-in forms are double opt-in forms.
How To Create A WordPress Opt-in Form With Aweber
Aweber makes it quite easy to create an opt-in form from their main dashboard. Let’s go ahead and create a simple opt-in form using a free template.
Open the Aweber Form Designer
Log into your Aweber dashboard and click the “Pages & Forms” menu item followed by “Signup Forms“. Next, click the “Create A Signup Form” button.
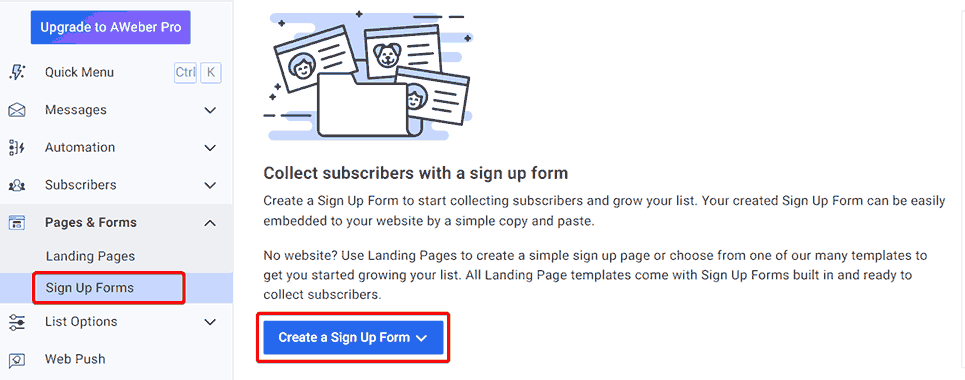
Select “For My Website” from the dropdown menu.
Design A Form Dashboard
The “Design A Form” dashboard has four sections to help you design your form:
Add Fields
The “Add Fields” section allows you to add custom fields to your form. For example, you may want your subscribers to include which country or city they live in before submitting their form.
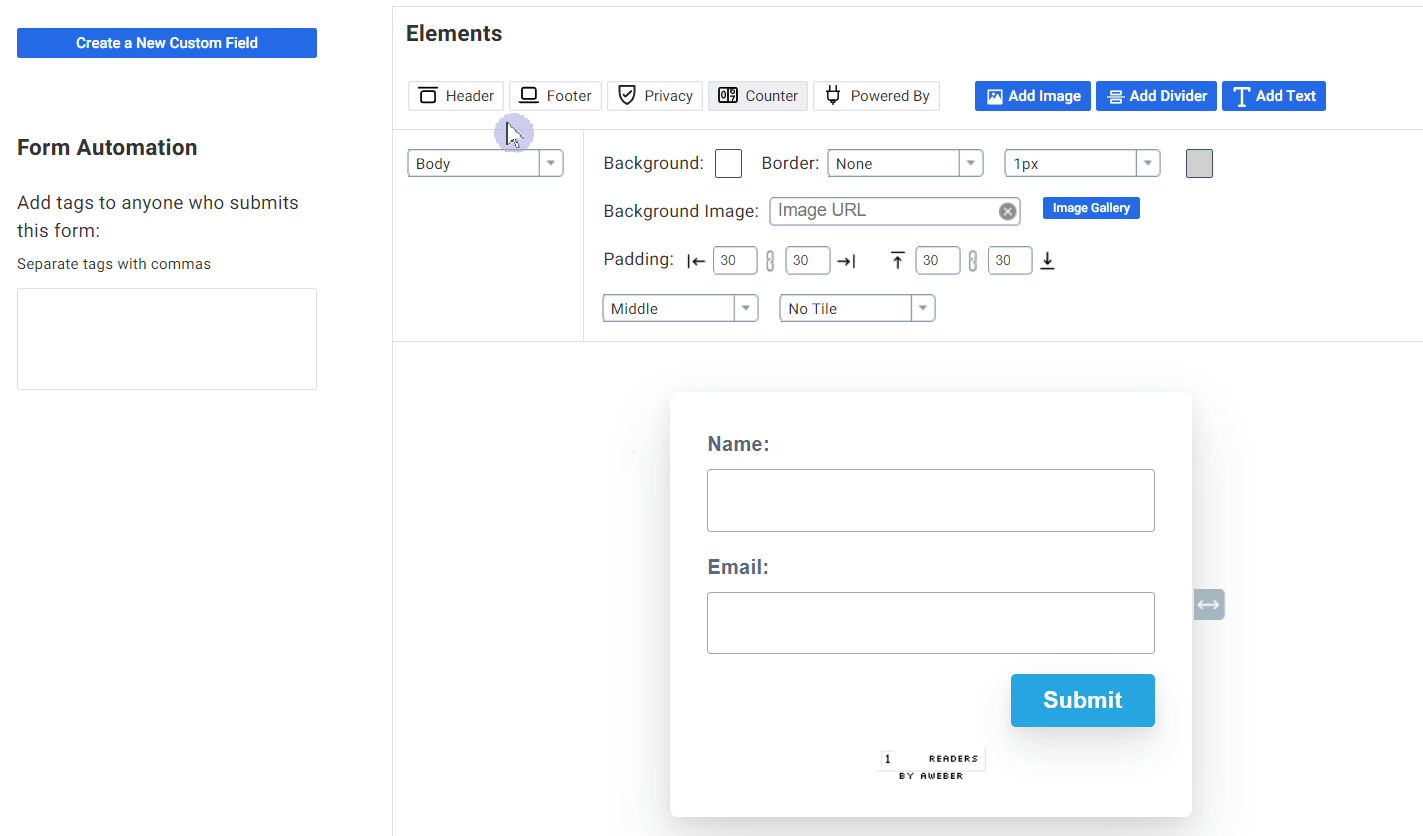
Form Automation
This section allows you to add tags to each of your subscribers. This is helpful if you have more than one type of person subscribing to your newsletters.
For example, if you have a photography business, you might want people who are interested in product mockup photography separated from people who are interested in bridal photography. You can use these tags to separate your subscribers so that they are sent the correct newsletter in the future.
Template Gallery
You will see that there are a stack of free signup form templates in Aweber’s template gallery! Choose a template to get you up and running quickly!
For this example, let’s use a basic template called “Shadow“.
Elements
The “Elements” section is where you will edit just about everything on your form and there are lots of options to choose from.
One of the more important elements to be aware of is the “Form Type” option.
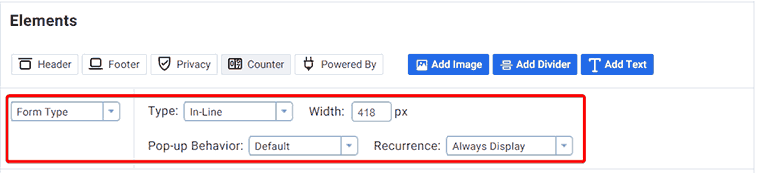
The Form Type option allows you to choose what type of form you would like to create. You have options for:
- In-Line: Your form appears within the content of your current web page.
- Pop-Over: A pop-over usually pops up and hovers over the content of your web page.
- Lightbox: A light box is the same as a pop-over with the exception that it darkens the web page in the background.
- Pop-Up: Pop-Ups usually open in a new window. However, because web browsers a pretty smart these days, these pop-ups are often blocked. Also, you aren’t always sure how pop-ups will behave on mobile.
For this example, let’s use a normal in-line form.
Let’s add a header to your form and also delete any text under the “Submit” button.
Go ahead and play with the rest of your form and when you are happy click “Save Your Form“. You will then be able to preview your form by clicking the preview button at the top right-hand side of the page.
If you are happy with how your form is working, you can go ahead and click “Go To Step 2” at the bottom right-hand side of the page.
Form Settings Dashboard
On the Forms Setting dashboard you will be able to give your form a name as well as choose a thank you page.
In my last tutorial, I showed you how to create a thank you page for your website. If you would like to use your own thank you page, this is where you will save the URL.
From the “Thank You Page” dropdown, select “Custom Page” and paste your URL there.
When you are done, click “Save Your Form” and then click “Go To Step 3“.
Publish Form
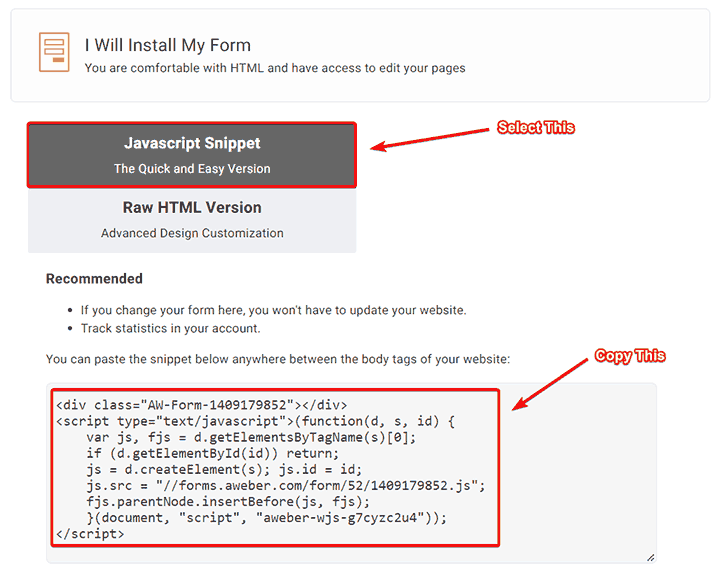
The final step in the process is to publish your form to your website. Select “I Will Install My Form“.
Two options will open – Javascript Snippet and Raw HTML version.
We will be using the Javascript Snippet option.
Using the javascript snippet is a great option because it will allow you to add your subscription form to just about anywhere on your website, including your sidebar or footer. And don’t worry, it is actually really easy to add the snippet to your website 🙂
Click “Javascript Snippet” and copy the code in the box below.
How To Add Your Opt-In Form To Your Website
Let’s go ahead and add our opt-in form to your website!
Go back to your WordPress website and open a page where you would like to include your subscription form.
Add a block called “Custom HTML“.
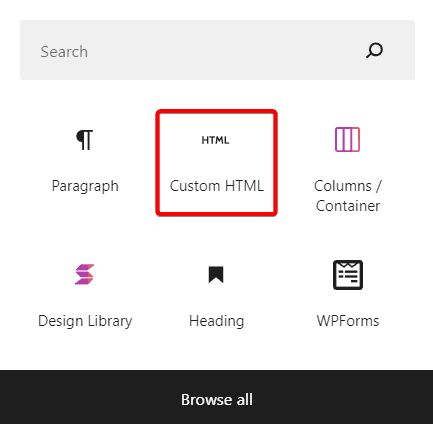
Paste the Javascript snippet into the text box. That’s it! You’re done 🙂
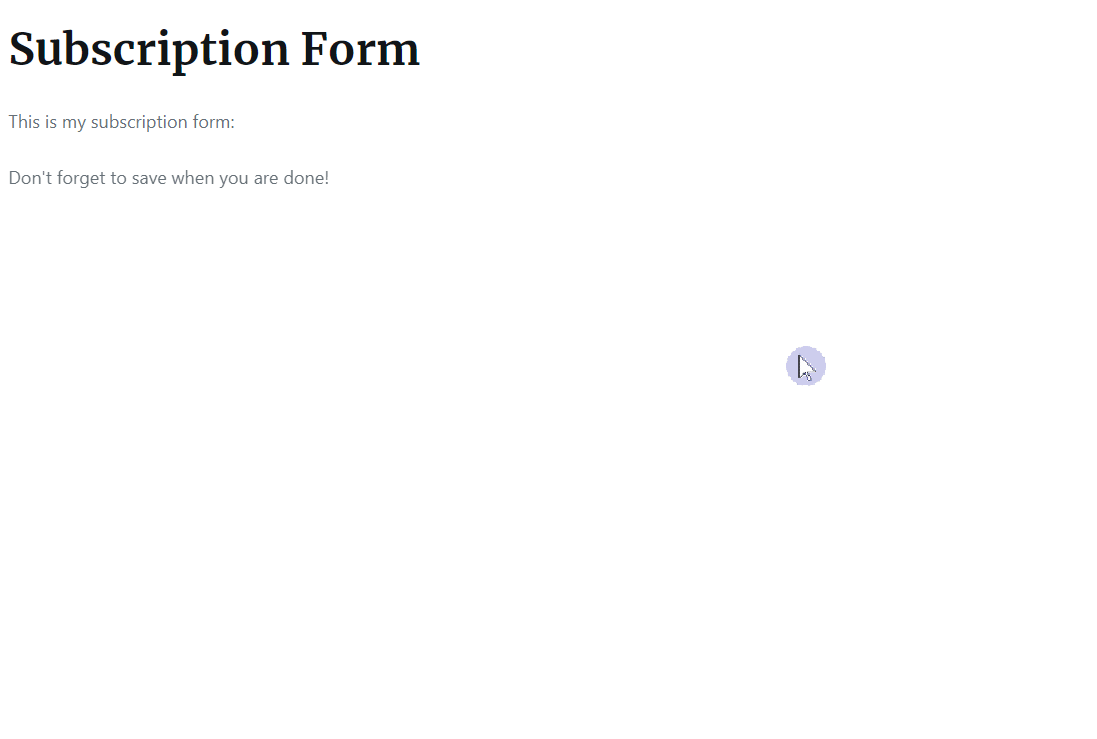
Click “Preview” to see what your form looks like and don’t forget to save when you are done.
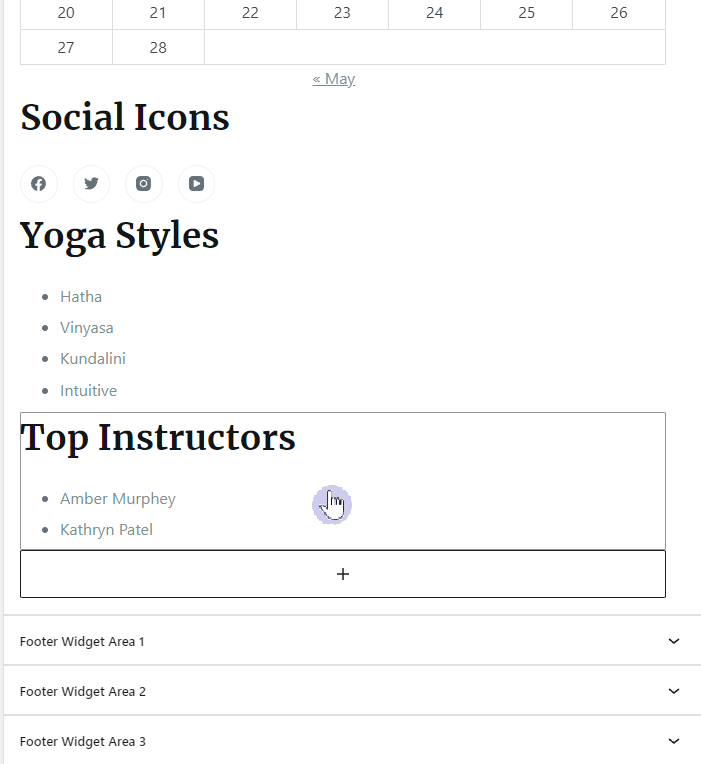
How To Add A Subscription Form To Your Sidebar Or Footer
If you would like to include your subscription form in your sidebar or footer, you can easily do so by using widgets.
If you aren’t sure how to use widgets, then check out this tutorial: Learn How To Use WordPress Widgets In 5 Minutes
Let’s add our subscription form to our sidebar (follow the same process if you would like to add your subscription form to your footer).
From the WordPress admin dashboard, go to “Appearance” > “Widgets“.
Add a “Custom HTML” block to your Main Sidebar widget area. Click “Preview“. Move it up or down depending on where you would like it placed within your sidebar.
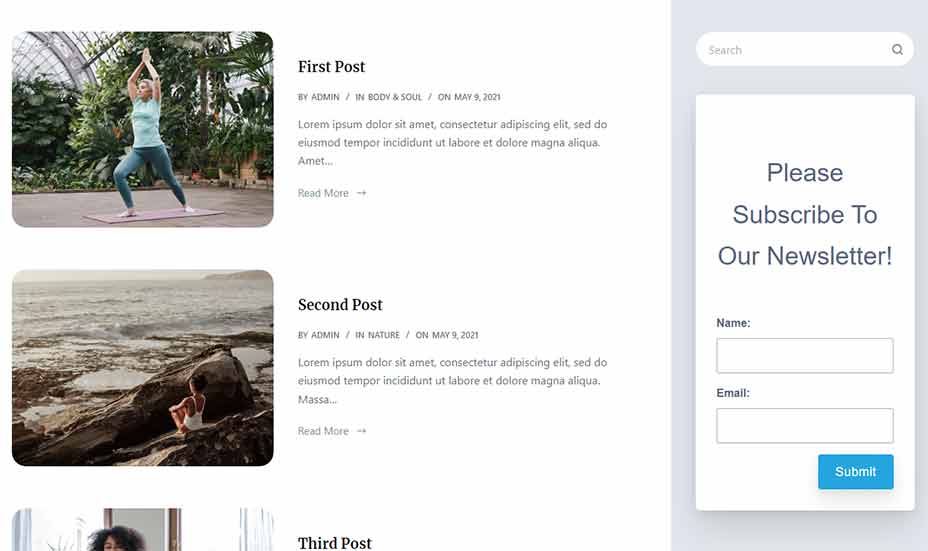
Once the subscription form has been added to the sidebar, it will look like this:
How To Edit Your Subscription Form After It Has Been Published
In our example above, the title might be a bit too big for the subscription box. Luckily it is easy to edit and customize your form quickly and easily.
Go back to your Aweber admin dashboard. Select “Pages & Forms” > “Signup Forms“. Click the “Edit” button below your form.
Make any changes you would like to your form and click “Save Your Form“.
Go back to your website and refresh your page. Any changes that you have made will automatically update on your webpage. Pretty cool right?
Once you are happy with your form, you can go ahead and test it. Sign up using another email address and when you click “Submit“, you should see that the email address is now added to the “Subscribers” dashboard in Aweber. You should also be redirected to the thank you page that we created in our last tutorial.
Conclusion
Once you have your email form up and running, you can easily keep an eye on your subscribers through the Aweber admin dashboard. From here you will also be able to create and send your first newsletter.
I hope that these tutorials have helped you set up your subscription form and that it is working well! If you have any questions, please let me know in the comments section below!