![]()

How To Add Content To WordPress: The Gutenberg Block Editor
Gone are the days when you had to spend hours and hours learning how to code web pages to create the exact look and feel you wanted for your website! Trust me, it wasn’t always easy!
Luckily, WordPress came to the rescue and made it really simple for regular folks to create awesome content for their websites. No more struggling with complicated tech stuff or confusing code! Thank you, WordPress!
WordPress comes with an awesome built-in website page builder called Gutenberg, or the Gutenberg Block Editor. The Gutenberg block editor is really easy to use when you know how, and it is packed with features that make creating content a breeze.
In this article, I’ll go over what the Gutenberg editor can do and how you can use it to easily design the layout of your web pages and add the content you need for your website.
Table of Contents
What Is The Gutenberg Block Editor?
Back in the day, WordPress used a traditional content editor that looked a lot like a traditional word-processing document. You could add text and images in a very similar way to Microsoft Word for example.
In 2018, WordPress released Gutenberg, a brand new editor which changed the way that people could create content for their websites.
Gutenberg is a block-based editor that has been designed to be user-friendly and intuitive making it easy for anyone to create professional-looking and engaging websites even if they are complete beginners.
It is also a visual editor that allows you to easily drag and drop content onto your WordPress pages and posts. Editing, moving, and rearranging content is also a breeze!
Fun fact! The Gutenberg block editor is named after Johannes Gutenberg, the inventor of the printing press.
How Does The Gutenberg Block Editor Work?
The Gutenberg block editor works by allowing users to add content to their pages and posts in the form of blocks, and there are blocks for just about any type of content you would like to add! From text blocks to image blocks to button blocks, the Gutenberg editor has got you covered!
Simply select the block you would like to use and it is added to your page. Need to move it? No problem! Simply drag and drop it!
What Are Gutenberg Blocks?
Gutenberg blocks are individual pieces of content that you can easily insert onto your WordPress post or page. They are like building blocks for your webpage and each type of content has its own block.
Each block has its own settings and actions making it easy for you to customize the look and feel of all your content. Using blocks you can easily change things like text color, alignment, position, etc.
Gutenberg also allows you to easily add more advanced types of elements such as tables and columns to your web pages.
Examples of Common Gutenberg Blocks
There are lots and lots of different types of Gutenberg blocks to choose from when building your web page. Here are a couple of examples:
Text Blocks
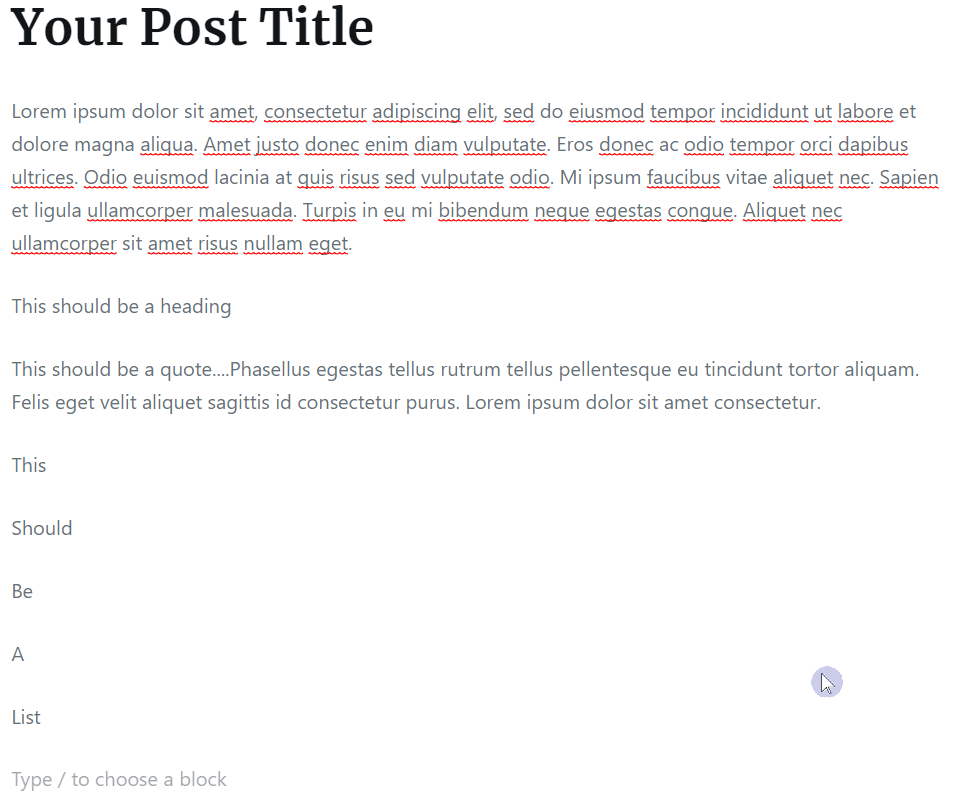
- Paragraph Block: For adding text
- Heading Block: For adding headings
- List block: for creating lists like this one
- Quotes block: for adding quotes and block quotes
- Button block: for adding buttons
- Table block: for adding tables
Media blocks
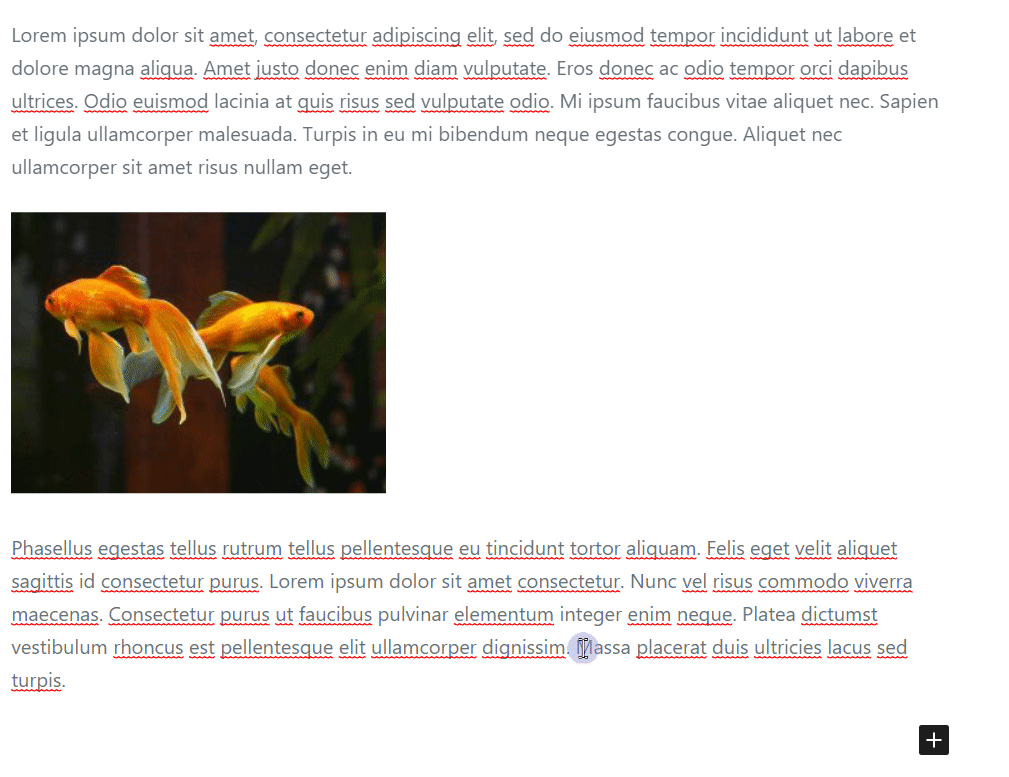
- Image block: for adding pictures and images
- Gallery block: for adding image galleries
- Cover block: for adding an image or video with the text overlay
- Audio block: for adding or embedding audio content
- Video block: for adding and embedding video content
Layout blocks
- Columns block: for creating more advanced layouts
- Spacer block: for adding blank space between other blocks
- Separator block: a horizontal separator that creates space between sections note page.
Widget blocks
- Calendar block: for adding a calendar of your sites post
- Latest post blocks: display the list of your most recent posts
- Latest comments: displays a list of your most recent comments
- Social icons block: displays the icons linking to your social media profiles
- Tag cloud block: displays a tag cloud with your most recent tags
Embed Blocks
- Twitter block: embed a tweet
- YouTube block: embed YouTube videos
- Spotify block: embed Spotify content
- Pinterest block: embed Pinterest pins, boards, and profiles
Besides these examples, there are lots of other blocks that you can choose from. In fact, Gutenberg makes it easy for developers to create their own custom blocks which can be added to the editor. You can also download plugins that add even more blocks to the Gutenberg editor.
How To Use Gutenberg To Create A WordPress Post
Let’s go ahead and start working with the Gutenberg editor! Your first step is to create a new post from the WordPress admin dashboard.
Posts > Add New
When the page opens you will be greeted by the Gutenberg Block Editor!
How To Add A Block
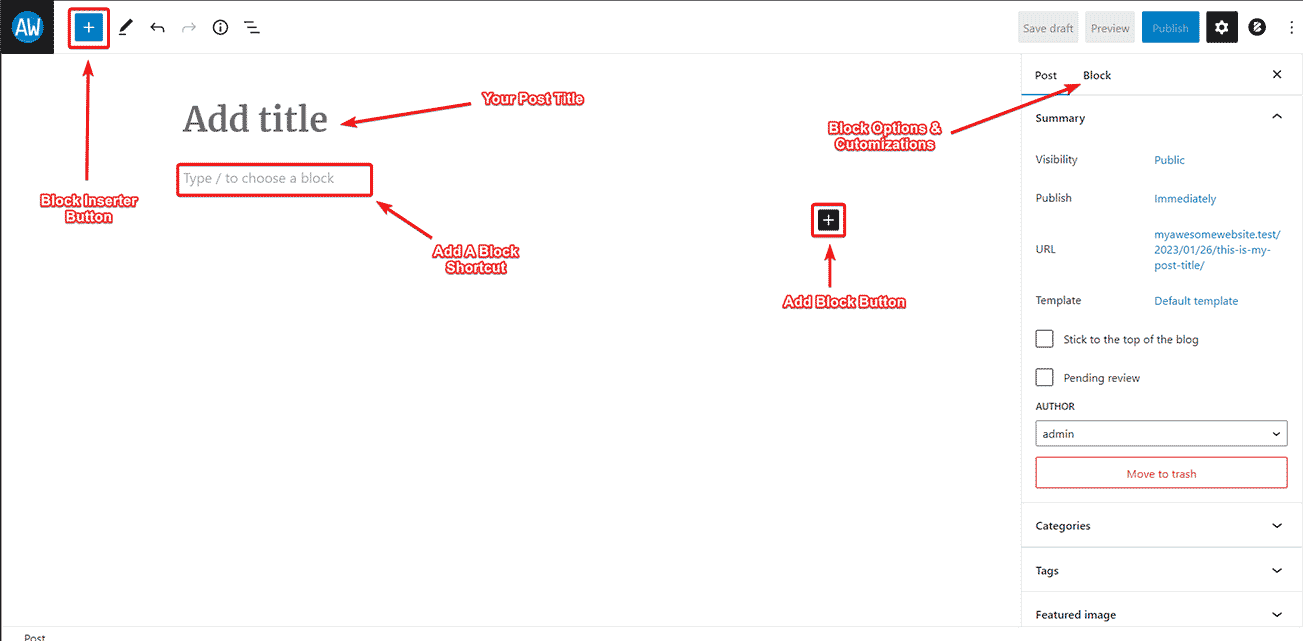
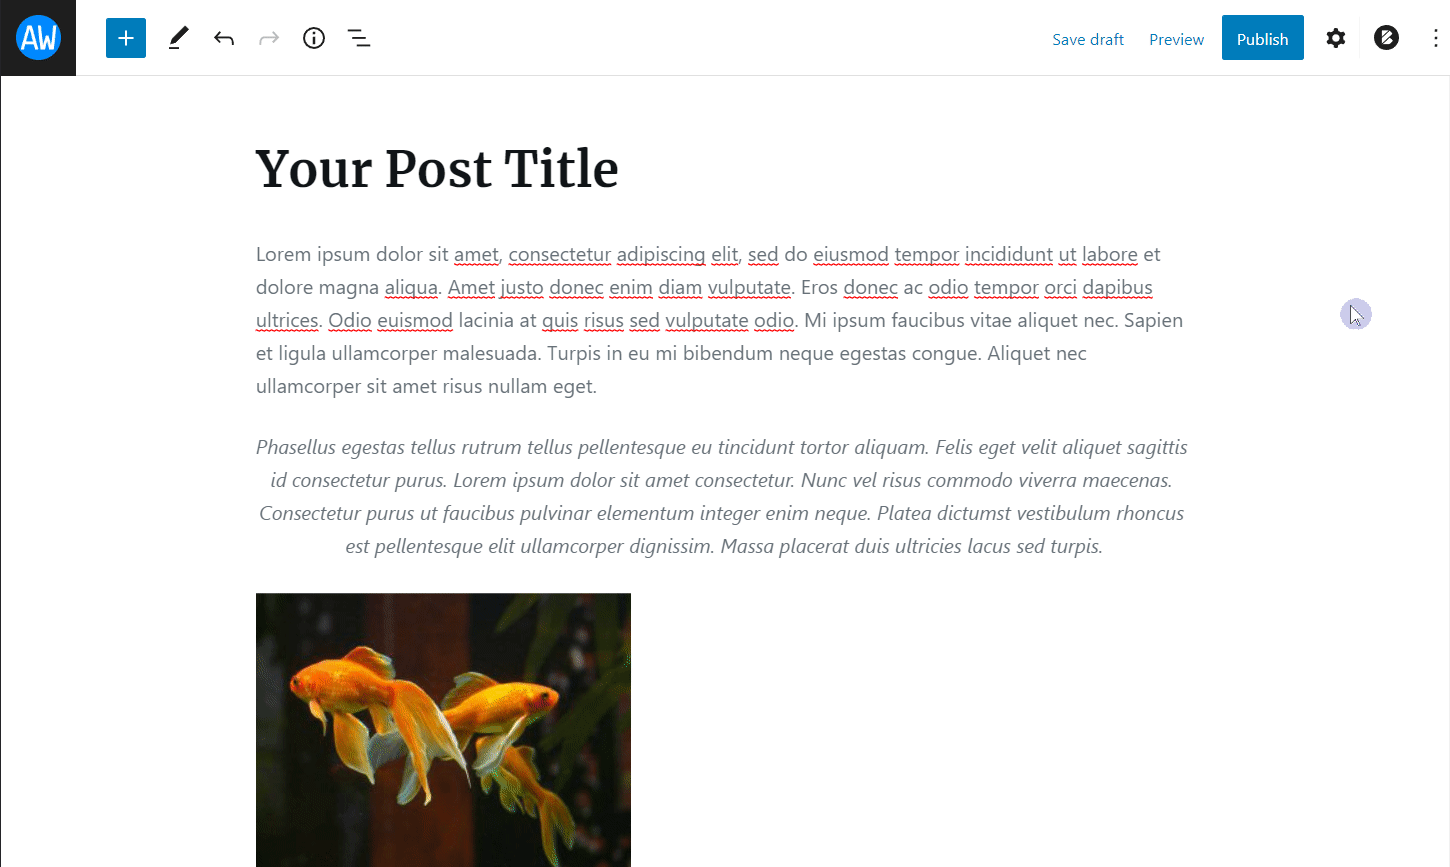
Before you begin creating your post, you’ll need to give it a title. Simply click “Add Title” and type in the title of your post.
There are three ways to add a block to your post. For all of them, you will need to place your cursor where you would like to add your block.
Note: By default, the paragraph block is selected when you hit “Enter” on your keyboard to move to a new line.
Block Inserter Button
Place your cursor on the first line of the editor (the line that says “Type / to choose a block”). Next, click on the blue button at the top left-hand side of the editor. A new dashboard will open where you will be able to select a block you would like to use.
If you move your mouse over any of the blocks, the editor will show you a preview of what the block will look like and it will give you a short description of what the block does.
You will also notice that there is a tab to the right of the “Blocks” tab called “Patterns“. If you click this tab you will see a number of ready-made layouts for you to choose from. Pretty neat right?!
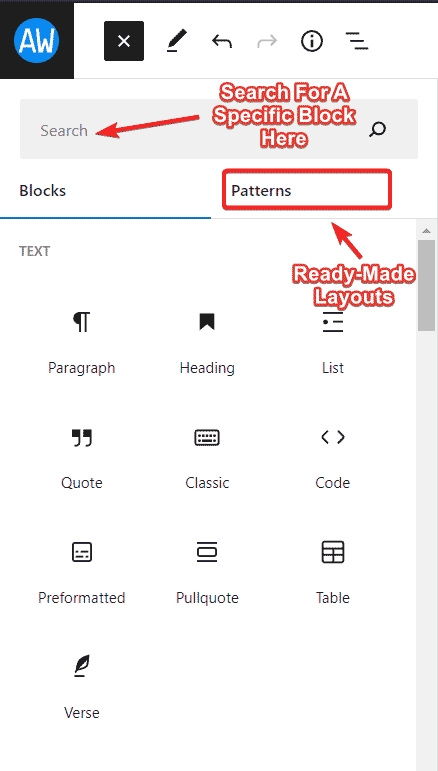
To close the block inserter, click the “x” in the black box at the top left-hand side of the page.
Add Block Button
To the right-hand side of the editor, you will see a little black button with a plus sign in it. This is the “Add Block” button.

To add a block, click the button and a popup will be displayed. Here you will have quick access to the most commonly used blocks as well as the blocks that you regularly use. If you click the “Browse All” option, the Gutenberg editor will open the Block Inserter Panel.
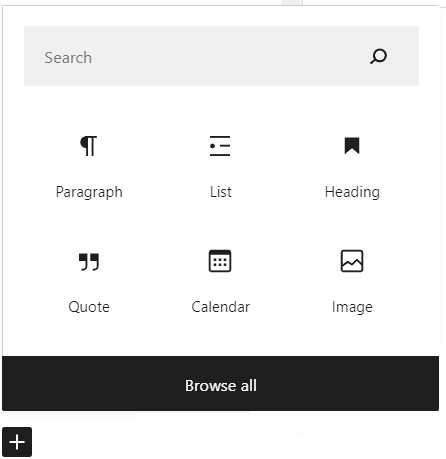
Simply click on any of the blocks you would like to use and the block will be added to your post.
You will notice that when you have more than one block on your screen, the “Add Block” button will move depending on where your mouse is.
For example, if you would like to add a block between two paragraphs, the “Add Block” button will automatically be displayed between them as you move your mouse into position.
Add A Block Shortcut
This is a handy feature of the Gutenberg editor that quickly allows you to add a block without clicking on any buttons. This is especially useful if you are working quickly and you know exactly what blocks you want to use.
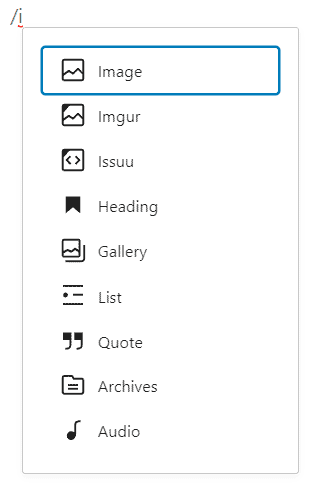
Place your mouse cursor on the line that says “Type / to choose a block”. Next press the “/” key on your keyboard. A window will open that will allow you to choose any block that you would like.

Pro Tip! You can begin to type any word after pressing the “/” key and the editor will open all the blocks that start with that letter. For example, if you would like to add an image to your post, type “/i” and the image block will be displayed along with any other blocks that begin with “i” or that the editor thinks are relevant.
How To Customize A Block
Once you have added a block to your post you will be able to edit and customize it directly in the editor.
There are two places where you will be able to customize any block that you use.
The Floating Toolbar
When you click on a block, a floating toolbar will appear just above the block. This toolbar will give you all sorts of editing options for that particular block. And these options will change according to the block that is being edited.
For example, if you click on a “Paragraph” block, you will have the following options:
- Paragraph
- Drag
- Move Up or Down
- Align
- Bold
- Italics
- Link
- More
- Options
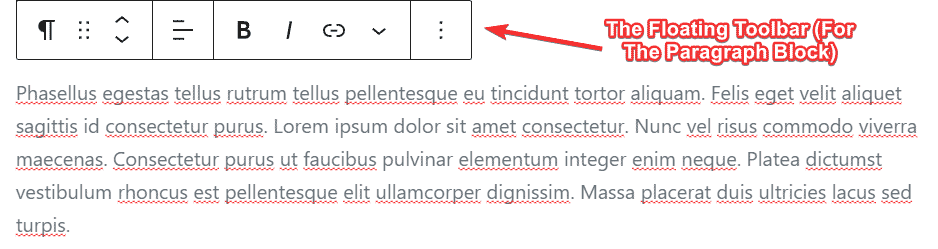
Clicking any of these buttons will allow you to customize your paragraph block.
The Block Dashboard
Along with the floating toolbar, you also have a dashboard where you can access all the options for your blocks. The options on this dashboard will change according to the block that you have selected.
You will find the Block Dashboard on the right-hand side of the page by clicking the “Setting” gear icon.
How To Change Block Type
Sometimes if you are busy or in a hurry to get a post done, you might not want to have to select blocks as you work – you might want to get all your typing done and then select blocks afterward. Or, you might want to copy and paste the text into your Gutenberg editor from another program and then do all the formatting afterward.
With the block editor, it is easy to change blocks that have already been added to your post.
To do this:
- Click on the block you would like to edit.
- Click on the “Paragraph” button on the floating toolbar.
- A window will open with the heading “Transform To“.
- Select the block type you would like.
How To Delete A Block
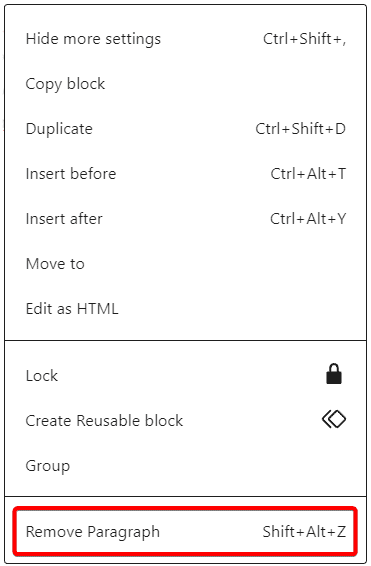
Deleting a block is also a piece of cake! Click on the block you would like to delete. On the floating toolbar, click on the options menu button.

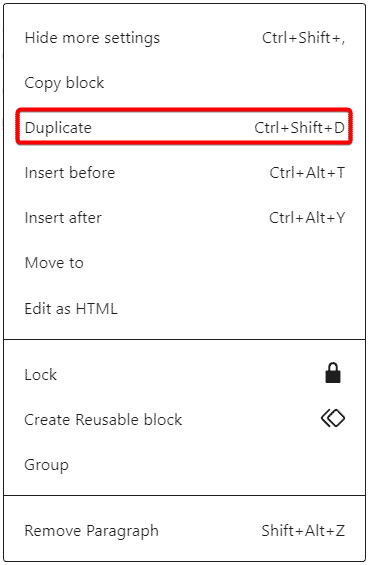
When the menu opens, scroll all the way to the bottom and click on the “Remove Paragraph” button.
That’s it, you’re done!
How To Move A Block
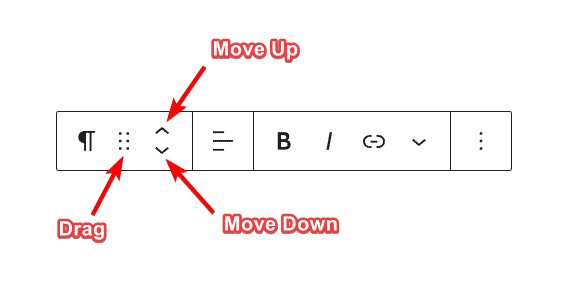
Moving a Gutenberg block is just as easy. Click on the block you would like to move. On the floating toolbar, there are two options to move the block – “Drag” and “Move Up” or “Move Down“.
The “Drag” button allows you to drag and drop the block to another position in your post while the “Move Up” and “Move Down” buttons allow you to move the block up or down one position each time the button is clicked.
You can also move blocks by cutting and pasting them to a new position in your post.
How To Duplicate a Block
If you would like to duplicate a block, click on the block you would like to duplicate. Click the “Options” button on the floating toolbar. Click “Duplicate“.
Conclusion
The Gutenberg Block Editor is an awesome tool that helps you create beautiful web pages and engaging content that your clients and website visitors will love! As you’ve seen, it has an intuitive design, an easy-to-use interface, and a wide range of tools and customization options that make creating professional-looking posts and pages for your website a breeze. And with a little practice and experimentation, you will become a Gutenberg pro in no time!