![]()

Editing The WordPress Footer: Beginners Guide (Blocksy Theme)
Just like every WordPress website has a header, every WordPress website also has a footer! And don’t think that just because your WordPress footer sits all the way at the bottom of your page that it isn’t important. In fact, the footer can be incredibly useful as it allows you to add all sorts of important information to your website.
Your website footer is the perfect place to include links to important pages on your website such as legal disclosures, contact information, and about pages. It is also the perfect place to add your contact information, social media links, and any other links you would like your clients or site visitors to have easy access to.
In this tutorial, I’m going to go over how to edit your WordPress footer using the Blocksy theme. By using the Blocksy theme, you are able to build a fully functional footer that you can design and edit exactly as you would like to. And the best part is that, just like the Blocksy header, the footer is also built using a drag-and-drop interface.
Let’s get started!
What Is A WordPress Footer?
A website footer is the area right at the bottom of a website that follows after the main content of the website. And just like the website header, the footer is usually displayed on every page of a website. It is a great place to include important website information such as disclaimers, privacy policies, contact details, etc.
The footer is also a really great place to include your brand information such as your logo and a short summary of what your brand is about.
How To Edit Your WordPress Footer
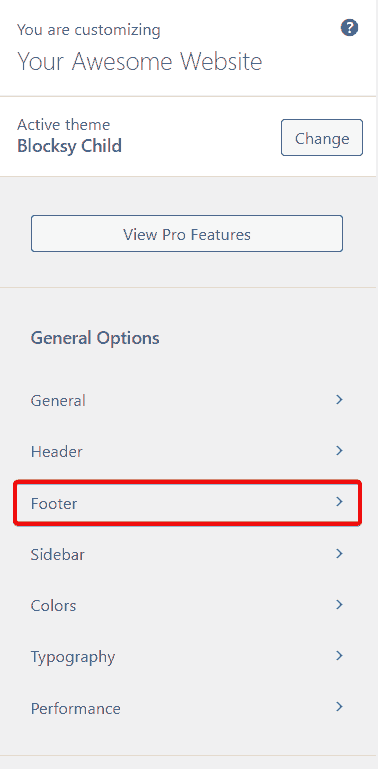
Before we begin, you will need to log in to your WordPress admin dashboard. Click “Appearance” and then “Customize“.
When the WordPress Customizer opens, scroll all the way to the bottom of the screen until you get to the footer of the website.
The Blocksy Footer Builder
Just like the Blocksy header, the footer is made up of three rows where you are able to drag different elements onto the footer builder.
You can access these options by moving your mouse over a specific element.
You can also access the footer options by clicking the “Footer” menu item on the left-hand side of the screen.
How To Edit The Footer Layout
To open the Blocksy footer builder, click “Footer” in the customizer menu.
You will see that the Footer Builder opens at the bottom of the customizer preview pane – it pretty much has the same layout as the Header Builder.
The Blocksy footer is made up of three rows – Top Row, Middle Row and Bottom Row.
For each row, you can have up to 6 columns with different layouts (bear in mind that these options change depending on what theme you are using).
The picture below shows what our footer currently looks like.
Note how there are three rows:
- The top row is currently empty.
- The middle row has four columns with a widget in each column.
- The bottom row contains a copyright block.

In the customizer menu area, you will see that you have a couple of elements that you are able to drag onto your footer. These include:
- Copyright
- Footer menu
- Socials
- Widget area 1
- Widget area 2
- Widget area 3
- Widget area 4
- Widget area 5
- Widget area 6
You will notice that the copyright element as well as widget areas 1, 2, 3 and 4 have already been used in the footer.
Related: Learn How To Use WordPress Widgets In 5 Minutes
How To Add Or Remove WordPress Footer Columns
If you would like to add or remove columns from your Blocksy theme footer you will need to hover your mouse over that row and click on the little gear icon that appears.

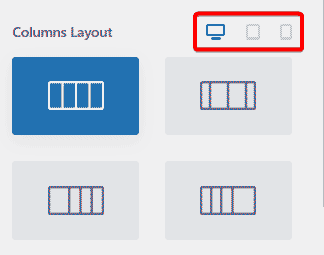
A new dashboard will open in the customizer window. Here you will be able to select the following options for your footer:
- Number of columns
- Column layout
- Column spacing
- Widgets spacing

If you would like to see the footer layout for tablet and mobile, just click the little icons to the right of each section header.
You will also notice a “Design” tab on the dashboard. Here you will be able to change things like the fonts, font colors, background colors, and dividers. I wouldn’t suggest that you change these just yet as we will change this globally later on.
How To Add Elements To The Footer
It is easy to add elements to the footer. Simply drag them from the customizer dashboard onto the footer builder. It doesn’t get much easier than that!
If you would like to remove an element, click the “x” on the right-hand side of the element box.
How To Change The Copyright Notice In The WordPress Footer
If you would like to change the copyright notice in the Footer, click the “Copyright” element in either the footer builder or in the customizer dashboard on the left.
A new will dashboard will open in the customize window. Here you will be able to customize the copyright text, its horizontal alignment, vertical alignment as well as which devices you would like the notice displayed on.
To change the footer notice, copy and paste the following text into the “Copyright Text” box (replace the text that is currently there):
Copyright © {current_year} - Your Website Name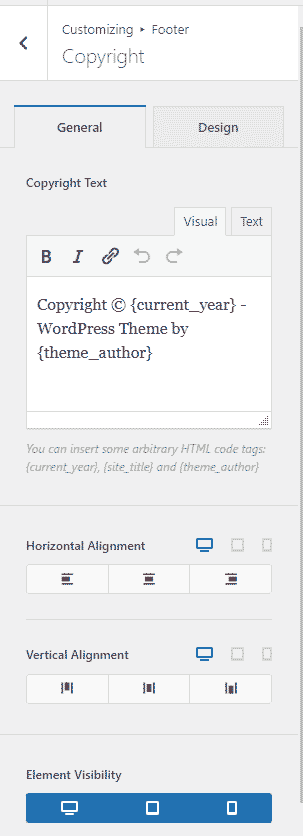
Remember to click “Publish” once you are happy with your changes.
How To Add A Disclaimer To Your WordPress Footer
The website footer is an ideal place to include a short disclaimer for your website. I usually add the disclaimer directly after the copyright notice.
To add the disclaimer, click on the “Copyright” element in the footer builder. The copyright dashboard will open in the customizer window.
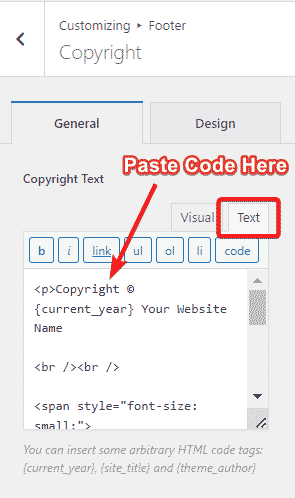
Click on the “Text” tab (see image below). Copy and paste the following code into the “Copyright Text” box (replacing the text that is currently there):
<p>Copyright © {current_year} Your Website Name

<br /><br />

<span style="font-size: small;">

Any information on our website is for informational purposes only and although we try our best to provide complete and accurate information, we will not be held responsible for any loss or damage, of any kind, as a result of using any of the information on this site.

</span></p>
Go ahead and edit the disclaimer text to suit your website.
Click “Publish” when you are done.
How To Edit Footer Widgets
There were two ways to edit the widgets in the footer. The first is directly through the WordPress widget editor.
The second way is directly from the footer builder.
Click on one of the widget areas and you will see the details for that widget open in the customization window.
From here you will be able to add, edit or delete information for the widget.
Learn how to use WordPress widgets by clicking here.
Remember to click “Publish” when you are done.
Conclusion
There are many different ways to use your website’s footer space – from social media icons, to contact details, to menus! I hope that this step-by-step footer tutorial has helped you get a good understanding of how to change the layout of your footer so that you can include all the details that you would like to.
If I have missed anything or if you need help, feel free to leave me a message in the comments section below!