![]()
How To Change The Layout & Design Of Your WordPress Posts
It is easy to change the layout and design of your WordPress posts especially if you’re using the Blocksy theme. In fact, the Blocksy theme gives you many customization options that you won’t find in many other free themes!
In this quick tutorial, I’m going to show you how to use the Blocksy theme to change the look and feel of your WordPress posts.
Whether you want to change font sizes, the position of featured images, or the layout and display of any other content, this tutorial should get give you a good understanding of how to make the changes you want.
By the end of this tutorial, you will be a pro at customizing your WordPress posts, giving them the unique look and feel that you want.
Let’s get started!
Open The Theme Customizer
Before you will be able to make any changes to your post layout you need to open the theme customizer. From the WordPress admin dashboard click “Appearance” > “Customize“.
Note: If you are using a different theme, the following options may be different. However, you should find all the customization options you need in the theme customizer regardless of which theme you are using.
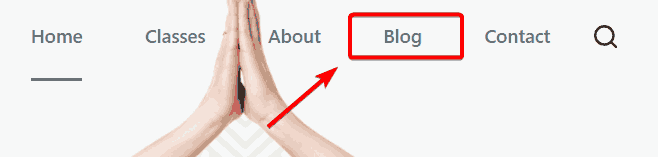
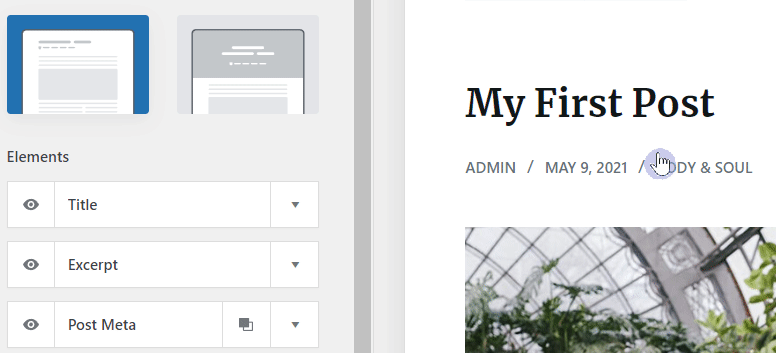
With the theme customizer open, navigate to a blog post using the customizer preview window. Click “Blog” in the header menu.
Click on the title of one of the posts.
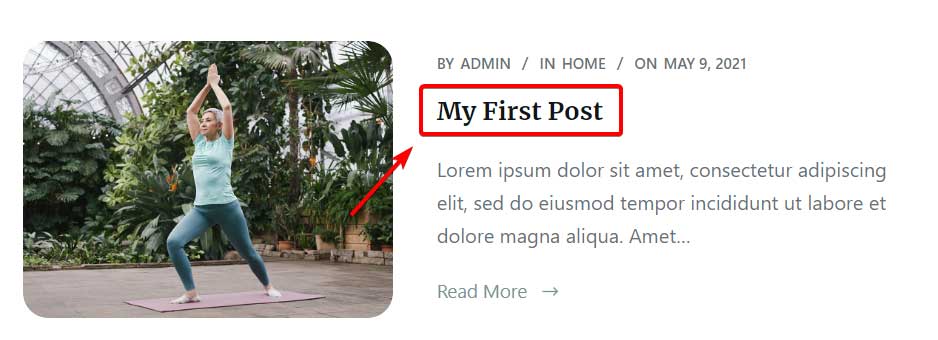
Your post should open in the theme customizer preview window so that you can preview your changes in real time.
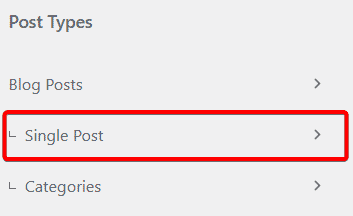
Next, select the “Single Post” menu item from the menu dashboard on the left-hand side of the screen.
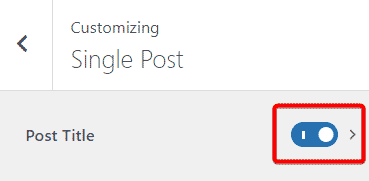
The Single Post Customizer
When the “Single Post” dashboard opens, you will have options to customize the following elements:
- Post title
- Post structure
- Content area Style
- Content area vertical spacing
- Post elements
- Page elements
Let’s work through each of these!
Post Title
In the “Post Title” section you’ll have the option to turn your post title on or off. If your post title is active and you want to edit its look and feel, click on the little arrow to the right of the post title toggle button.
Note: The “Post Title” section includes the title, excerpt, post meta and breadcrumb elements for your post.
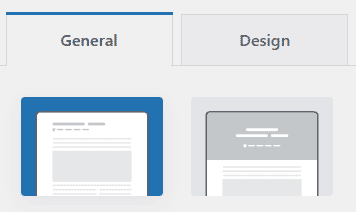
The post title dashboard has two tabs, “General” and “Design“.
In the “General” tab, you can customize the layout of your post. In the “Design” tab, you can customize the fonts and the font colors.
Layout
Your first option in the general tab allows you to specify the post layout you want.
You have two options, Type 1 and Type 2.
Type 1 gives your post a clean, classic look while type 2 allows you to have an image in your header along with your title and other header elements.
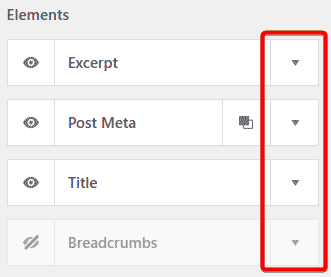
Elements
The “Elements” section gives you options for what you would like to display in your title. You have four options:
- Title – the title of your blog post.
- Excerpt – a short description or excerpt that you’ve set for your blog post.
- Post meta – here you can choose what meta information you would like to be shown. For example, you can display the post author, published date, comment count, etc.
- Breadcrumbs – a quick way for visitors to navigate your posts.
How To Use Elements
Display Or Hide Elements
Click the little eye icon to choose whether an individual element should be displayed or not.
Change The Order Of Elements
To change the order of the title elements, simply drag and drop them in place.

How To Edit Individual Elements
To edit individual elements simply click the little down arrow to the right of each element box.
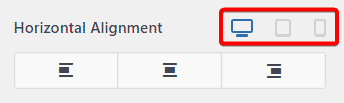
Horizontal Alignment
In the “Horizontal Alignment” section, you can choose whether you would like your post title to be left-aligned, center-aligned, or right-aligned.
You can also choose the alignment of your title specifically for tablets and mobile by clicking the little icons to the right of the heading.
Container Bottom Spacing
Control how much space is between your post title and the rest of your post content.
Design Tab
Under the “Design” tab, you can change the font and font colors for your title, metadata, and excerpt.
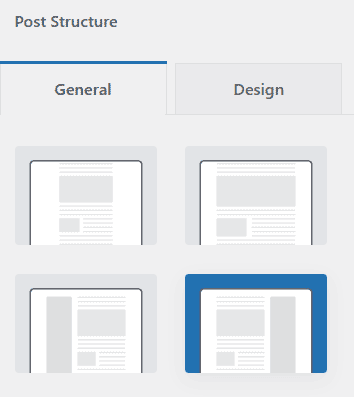
Post Structure
In the “Post Structure” section, you can choose the layout you would like for your post.
You have four options:
- Narrow width
- Normal width
- Left sidebar
- Right sidebar
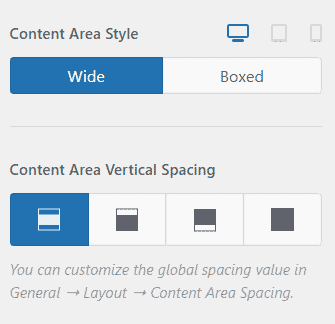
Content Area Style And Vertical Spacing
In this section, you can control how your post is laid out from a spacing and styling perspective.
Post Elements
In the “Post Elements” section you will be able to specify whether you would like the following elements displayed:
Featured Image
If you choose to display your featured image, click the little arrow to the right of the toggle button to customize the image options.
You will be able to choose whether you would like your image displayed above or below the title as well as the size of the image.
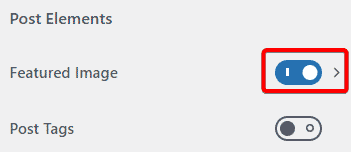
Posts Tags
Post tags are displayed at the bottom of your post. These are the tags that you assign to a post when you first create it.
Share Box
A share box is used to display social media icons that allow your visitors to quickly share your content to their favorite social networks.
There are quite a few options for your share box including whether you would like to use your own theme colors or whether you would like to use the official colors for each icon.
You can also choose whether you would like your social icons to be displayed at the top of your post or at the bottom. Don’t forget to choose which networks you would like to display along with the icon size you would prefer.
Author Box
The author box is really handy if you have more than one person writing for your website. It can display all the author’s details including how many articles they have written, as well as their social media handles.
Clicking on the little options arrow will open up the author box dashboard where you will be able to choose the look and feel of your author box as well as whether you would like to display things such as post counts and social icons.
Post Navigation
If you choose this option you will see that a section is created at the bottom of your post page with links to your previous posts.
Page elements
There are two options under the page elements section:
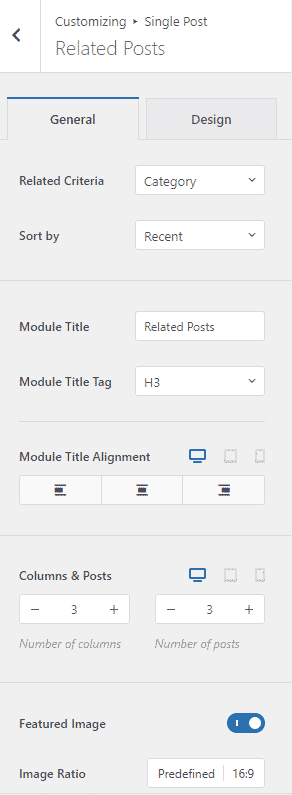
Related Posts
The “Related Posts” option will create a new section at the bottom of your posts which will display any posts related to the current post.
If you click the little option arrow you will be able to specify how these posts are selected. You can choose to have them grouped by category or tag and you can also sort them according to date, comments, or even randomly.
Along with these options, you can also choose how many columns and posts you would like to display as well as whether you would like to display the featured image.
Comments
The final option for our posts page is comments. Here you can choose whether you would like comments displayed or not. You will also be able to customize the layout and design of your comments box.
How To Change The Layout Of Individual Post Pages
When you begin publishing content you might want to change the layout of an individual post without it affecting your other posts.
For example, you might decide that you do not want website visitors to add comments to a specific post. In this case, it is possible to easily change the layout for individual posts, especially if you are using the Blocksy theme.
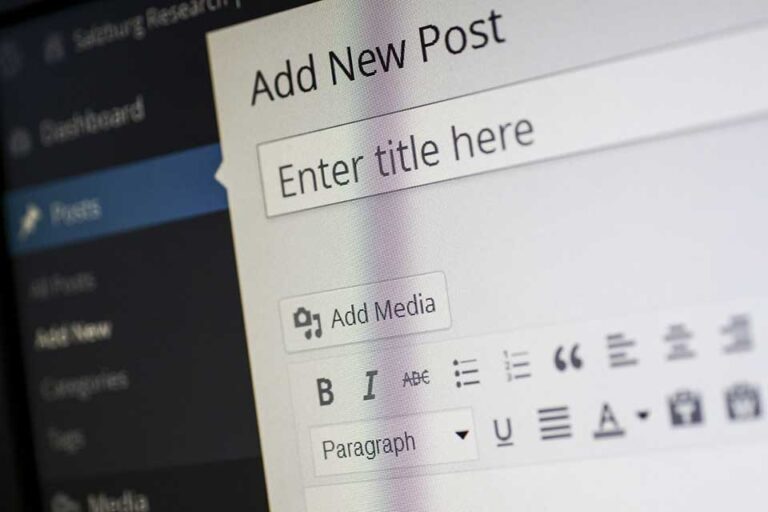
To do this, you will need to go back to your WordPress admin dashboard. Click “All Posts” and then click on the post you would like to edit.
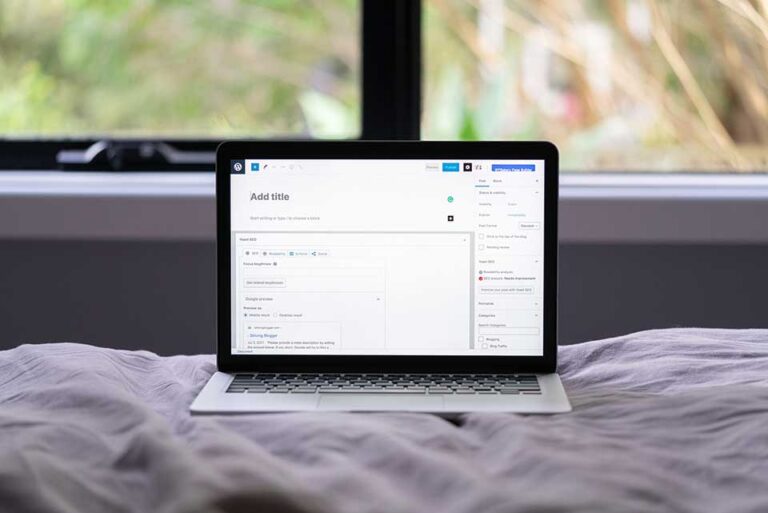
When the Gutenberg post editor opens select the Blocksy settings option at the top right-hand side of the page.
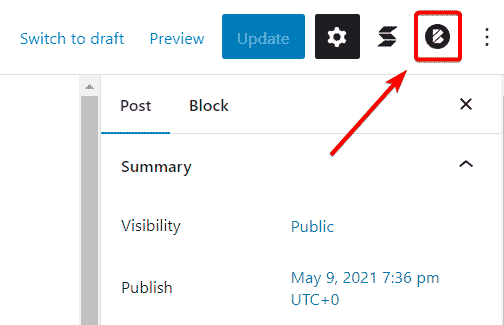
When the Blocksy settings dashboard opens you will see very similar options to what was available in the theme customizer.
From the dashboard you will be able to change the following elements for this specific post:
- Post title
- Post structure
- Style and vertical spacing
- Post elements
- Page elements
Post Elements
In the “Post Elements” section you will be able to disable the following post elements:
- Featured image
- Post tags
- Share box
- Author box
- Post navigation
Page Elements
In the “Page Elements” section you will be able to disable the following page elements:
- Related posts
- Header
- Footer
Conclusion
As you’ve seen, the Blocksy theme gives you tons of awesome options when it comes to the layout and design of your post pages! And even though it can feel like there are a hang of a lot of options, you will find that the more you use the theme it will become more and more intuitive.
If you are still a little stuck though, please drop me your questions in the comments section below!