
If you are still new to WordPress you might have been trying to figure out how to create a menu for your WordPress website. Don’t worry, it’s actually pretty easy!
In this tutorial, I’m going to break down the process of creating a wordpress menu and we will also look at how to add the menu to your website.
If you have been following along with my tutorials, you will know that in my last tutorial, I went over how to create the legal pages that you need for your website. In this tutorial, we are going to add your legal pages to a menu which we will then add to the footer of your website.
Let’s get started!
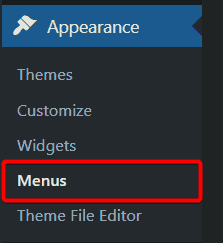
Open The WordPress Menu Dashboard
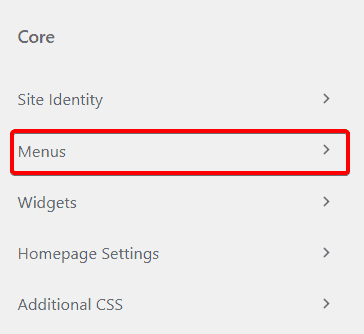
To begin, you need to log in to the WordPress admin dashboard. Click “Appearance“, followed by “Menus“.
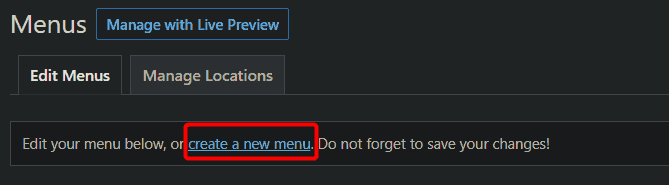
Create A New WordPress Menu
To create a new menu simply click the “create a new menu option” at the top of the page.
A new window will open where you will be able to give your new menu and name.
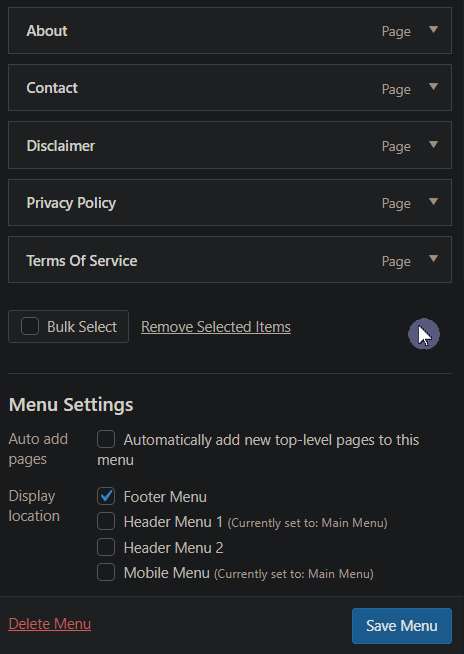
Here, you will also be able to choose where you would like that menu to be displayed.
Please note that these options do change depending on what theme you are using.
If you’ve been following along with these tutorials you will know that we are using the Blocksy theme. Blocksy allows you to create two header menus, one footer menu, and one mobile menu.
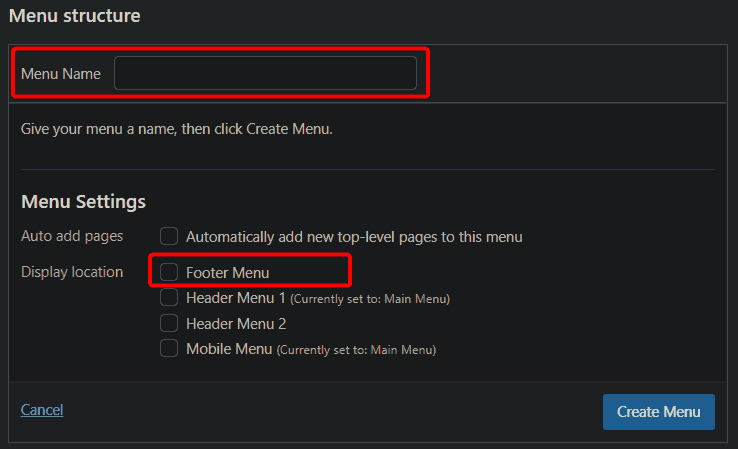
Go ahead and give your menu a name. You can also select the footer menu checkbox. When you’re done click “Create Menu“.
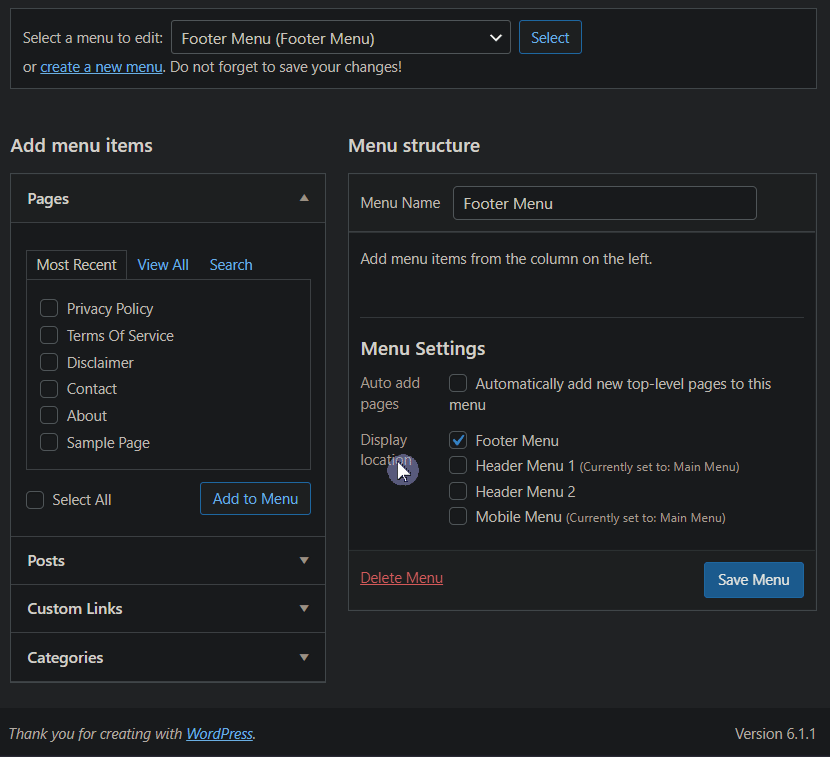
Select A Menu To Edit
Once your new menu is created you will need to select it so that you can edit it. You can do this by clicking the drop-down menu and choosing the menu that you have just created.

Add Menu Items To Your Menu
It is really easy to add items to your menu, and you can add just about anything you would like to. WordPress makes it easy to add the following items to your menus:
- Pages
- Posts
- Custom links
- Categories
Simply select the items you would like to include and click “Add To Menu”.
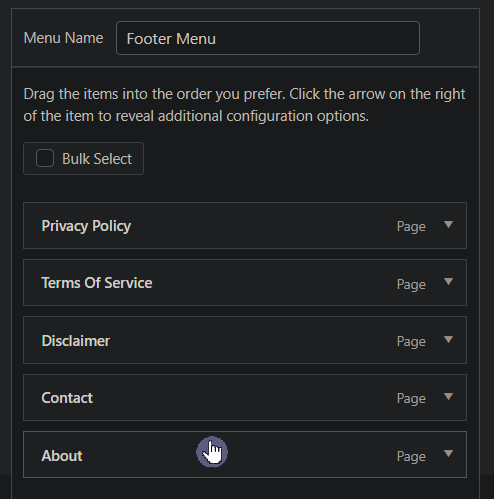
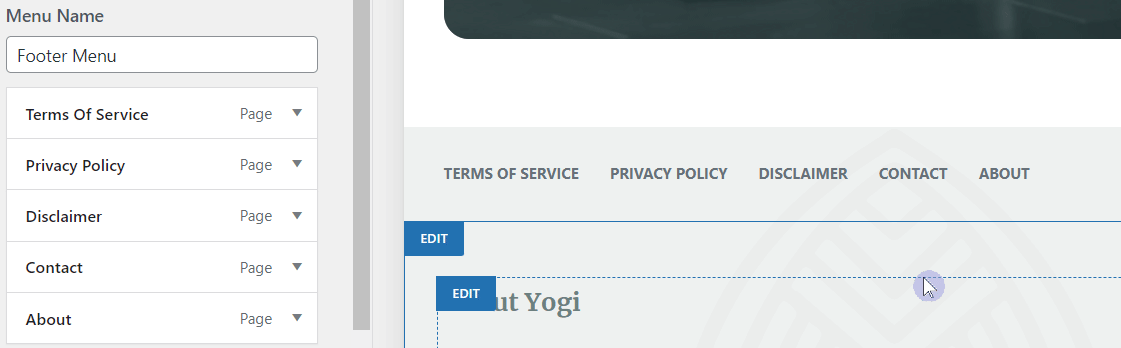
Let’s go ahead and add our Privacy Policy, Terms Of Service, Disclaimer, Contact, and About pages to the menu. Click “Save Menu” when you are done.
How To Rearrange WordPress Menu Items
It is really easy to rearrange your menu items. Simply drag and drop them into position!
If you are using the Blocksy theme, there is another way to rearrange your menu items which we will cover later in this tutorial.
How To Edit A WordPress Menu Item
If you would like to edit a menu item, click the little drop-down arrow to the right of the menu item. The menu item will expand and you will have the option to make changes to it. This includes deleting the menu item if you would like to.
How To Create Submenus
If you would like to create submenus you can also just drag and drop them into place. For this example, let’s move the Privacy Policy and Terms And Conditions pages underneath the Disclaimer menu item so that they become submenus of the Disclaimer Menu item.

If you would like to return menu items back to their original positions, simply drag them back toward the left of the menu panel and they will snap back into their original positions.
Remember to click “Save Menu” when you are done.
How To Add Your Menu To Your Website Footer
Let’s go ahead and add our newly created menu to the footer of our website.
If you need help editing the footer of your website check out this tutorial: Editing The WordPress Footer: Beginners Guide (Blocksy Theme)
To begin you need to open up the theme customizer.
Pro Tip! You can do this directly from your website by clicking on the “Customize” button at the top of your web page.

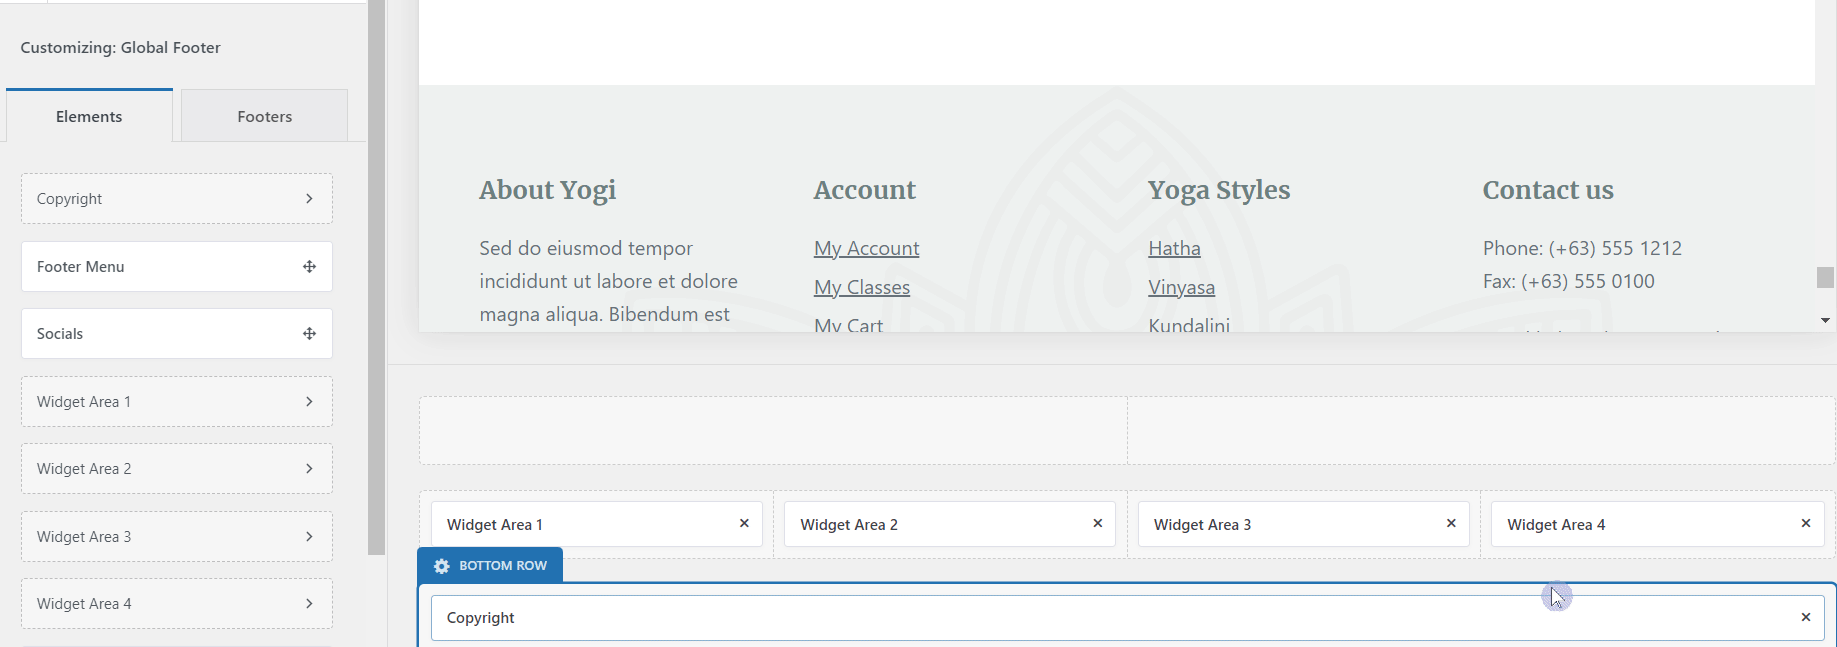
With the theme customizer open click on “Footer“.

Please note that these options may change depending on what theme you are using.
The Blocksy footer builder will now open and you will be able to add your menu to the footer area.
Go ahead and add the menu to the top row of the footer (if you haven’t already done so, scroll all the way to the bottom of the page so that you can see the changes in real time).
How To Rearrange Menu Items In The Blocksy Theme
If your menu items are not in the correct order and you would like to rearrange them, you can do this directly from the Blocksy theme customizer.
Click the back button at the top of the customizer window.
You will now be back at the general options menus. Scroll all the way down until you reach “Menus“.
Click “Menus“. The menus dashboard will open where you can select your footer menu.
When the dashboard opens, you will be able to drag and drop the menu items into the correct positions in the same way as you did in the main WordPress menu dashboard.
Don’t forget to publish your changes when you are done!
And that’s it! That’s pretty much all there is to adding menus to WordPress!
If you want to add, edit, or delete any menu items for the Main Menus and the Mobile Menu you would follow the same process.
Conclusion
Adding menus to WordPress is pretty easy when you know how! And because website menus are crucial for allowing your clients and visitors to easily navigate your website, it’s important that you set them up correctly.
I hope this tutorial has helped you figure out how to use WordPress menus. But as always, if you have any questions, please let me know in the comments section below!