![]()

How To Create Pages In WordPress: Beginner’s Tutorial
In my last article, we went over the most important legal pages for websites and how to generate them.
In this tutorial, I want to show you how to create pages in WordPress and we’ll be adding the legal pages that we created in the last article to your website. I’ll walk you through the steps needed to create, edit, format, and publish pages in WordPress.
By the end of this tutorial, you will have created and published the legal pages for your website.
Let’s get started!
Related: WordPress Posts vs Pages: Understanding The Differences
Table of Contents
How To Add A Page In WordPress
Before we begin, we need to make sure that you don’t already have a privacy policy page that has been created by WordPress or your theme.
To do this, head on over to the WordPress admin dashboard and select the “Pages” menu item. When the page opens you will see a list of all the pages that your website currently has. If there is a privacy policy page you will need to delete it by hovering your mouse over it and clicking “Trash“.

Let’s go ahead and create a brand-new privacy policy page!
Click “Add New” on the top left-hand side of the page.

An Overview Of The WordPress Page Editor
The WordPress page editor has been built to be intuitive and easy to use. Let’s go through a few of the basics.

WordPress Publication Settings
You will find all your publication settings on the right-hand side of your page. When working on your page you have three options:
Save draft
“Save Draft” allows you to save a draft of your page.
You will notice that as you work WordPress will also automatically save your page for you. After you have published your page, this button will be changed to “Switch to draft“. This will allow you to convert a published page back into a draft.
Preview
The “Preview” button allows you to preview and check what your page will look like either for desktop, tablet, or mobile before publication. Click “Preview in new tab” to open a preview of your page in a new tab.
Publish
When you click the “Publish” button, a pre-publish checklist will pop up so that you can double-check all your settings before publishing. Once published, this button will convert to an “Update” button. This will allow you to make changes to your page and update them after they have been published.
WordPress Page Settings
The page settings dashboard displays a summary of all the settings available for your page. You can toggle this dashboard by clicking the little gear icon at the top right of the page.
Visibility
The “Visibility” option allows you to control how your page is viewed. There are three options:
- Public: the page is visible to everyone.
- Private: your page is only visible to site administration and site editors.
- And password protected: this option allows only those who have a password to view this page.
Publish
The “Publish” option allows you to decide whether you would like to publish your page immediately or whether you would like to publish at a later date. Clicking this option will open up a calendar where you can choose date and time of publication for a page you want to publish later.
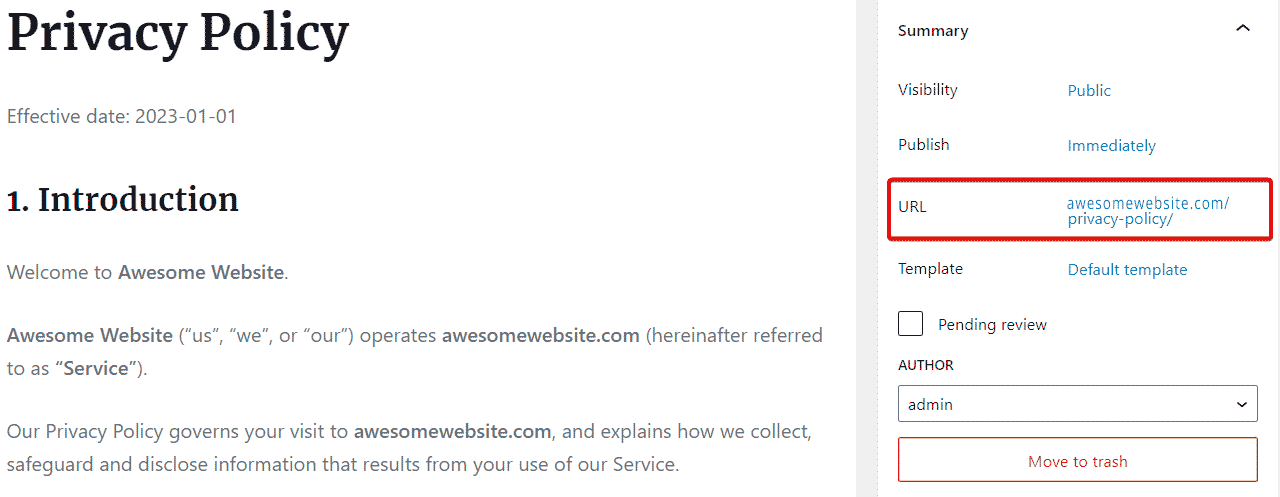
URL
The “URL” option allows you to set the URL for your page.
Template
WordPress page templates are pre-designed pages that will allow you to change the layout and appearance of a specific page or set of pages in your WordPress website. Page templates can either come with the theme or can be created by the user.
Featured Image
The featured image option allows you to upload an image for your page.
Related: How To Use The WordPress Media Library: 5-Minute Tutorial
Excerpt
It is optional to create an excerpt for your WordPress page. However, if you would like to you can simply write a one or two-sentence description of the page. If the excerpt box is empty then WordPress will automatically create an excerpt for you using the first 55 words of your page. If you are using an SEO plug-in, you will also be able to set up the excerpt here.
Discussion
The “Discussion” dashboard allows you to control whether people are able to add comments to your page. You can turn on comments for your page by clicking “Allow Comments“. The setting will only affect this particular page.
Page Attributes
The “Page Attributes” dashboard allows you to set a parent page and it also allows you to change the order of pages.
Related: WordPress Posts vs Pages: Understanding The Differences
Blocksy Theme Settings
The Blocksy theme comes with its own handy settings panel which you can access at the top right-hand side of the page.
Here you will be able to customize additional settings for your page.
Page Title
The “Page Title” dashboard will allow you to customize your page title from within the page settings. There are three options:
Inherit – the page will inherit all the options that have been set as default in the theme customizer.
Custom – the custom page allows you to customize the look and feel of this page specifically. You’ll be able to customize the page layout as well its alignment and spacing. Under the design tab, you will also be able to customize the title font and Colour.
Disabled – if you would like to disable your page titles then you can select this button.
Page Structure
The “Page Structure” dashboard is handy if you want to change the layout of this specific page. Your options include the following:
- Inherit from customizer
- Narrow width
- Normal width
- Left Sidebar
- Right Sidebar
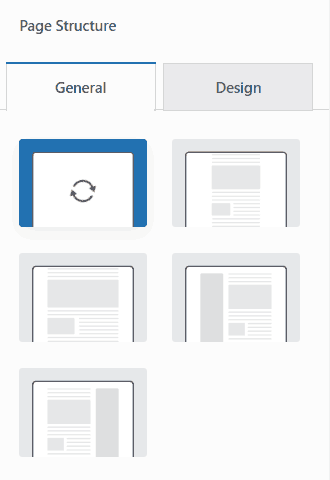
Under the “Design” tab, you can change the page background color.
Page Elements
Under “Page Elements“, you will be able to disable a couple of elements that you might not want to include on your page. Here you can disable the following options:
- Featured image
- Share box
- Header
- Footer
Let’s Create Our Privacy Policy Page
Let’s begin building our page!
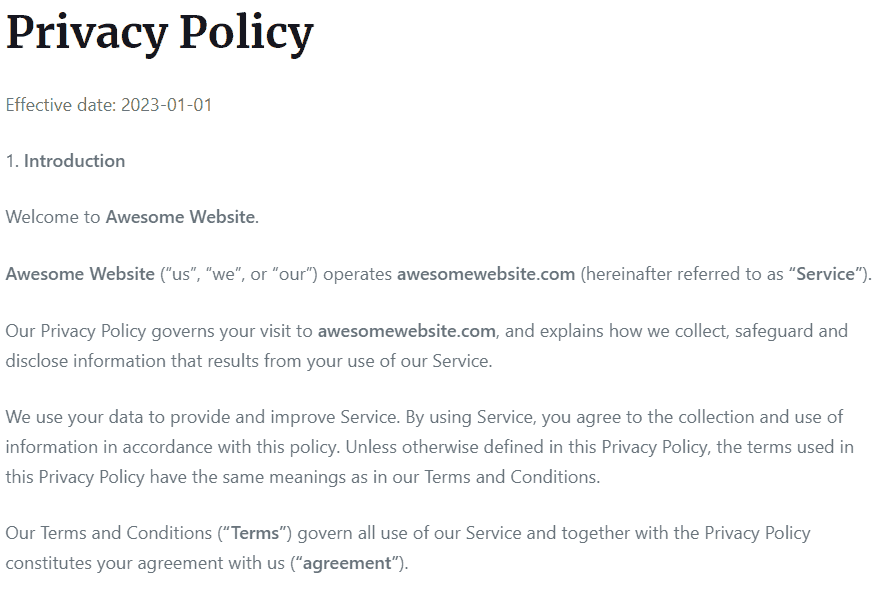
1. Add Page Title
At the top of the page, you will see the heading that says “Add Title“. Click here to give your page a title. The page title should be descriptive and concise and could and could contain keywords to help users and search engines understand what your page is about.
Because we are creating a privacy policy page, simply type “Privacy Policy“.
2. Start Typing
After you have added your page title, it is time to add your content. By default, WordPress uses the paragraph block when you start typing or press the enter key. This makes it very much like a normal word processor.
For a full breakdown of how to use the page editor check out this article: How To Add Content To WordPress: The Gutenberg Block Editor
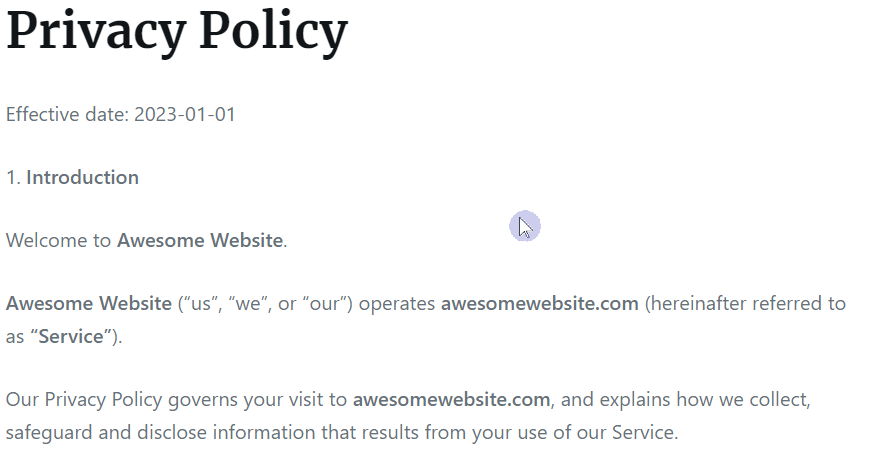
If you’ve been following along with that tutorials you would have created your privacy policy in our last tutorial. You can simply copy and paste the text that was generated into the page editor.
Your page should now look like this:
Easy right?
If you want to see what your page looks like click the “Preview” button on the top right-hand side of the page.
3. Add Formatting
Let’s go ahead and add some formatting to the page – we will convert some of the privacy policy section headings into WordPress headings.
4. Check Page Settings
When you are done formatting your page you can go ahead and preview your page to make sure you are happy with it.
Before publishing, we need to make sure that you are happy with your page URL.
Generally, WordPress will automatically change your page URL to match your page title. So in this case, with your page title being “Privacy Policy”, your URL should be:
www.awesomewebsite.com/privacy-policyHowever, if you would like to change it you can do this by clicking on the URL settings in the post setting dashboard.
5. Publisher Your Page
When you are happy with what your page looks like and how the URL will be displayed he can go ahead and publish the page.
Congratulations you have just created your first page in WordPress!
What’s Next?
You can now go ahead and create your “Terms of Service” and “Disclaimer” pages.
If you haven’t been following along with our tutorials, you can learn how to generate legal pages for your website by checking out this article: 3+ Must-Have Legal Pages For Websites & How To Generate Them
Conclusion
I hope that this tutorial on how to create pages in WordPress has helped you understand how to quickly create the pages you need for your website. In my next tutorial, I will show you how to create a menu so that your pages can be displayed in the footer of your website.
In the meantime please let me know if you have any questions or have any trouble creating a page!