![]()

How To Create A Thank You Page With WordPress [Easy Beginner’s Guide]
As a small business owner, you probably already know just how important it is to create a great website for your business. But, have you ever thought about your website’s thank you page?
Often the thank you page is overlooked when it comes to building a website which is a pity because it is a page that can really be used to your advantage! A well-thought-out thank you page can help you connect with your website visitors and can become an important part of your marketing strategy if used well.
In this article, we’ll go over why your thank you page is important and how to create a thank you page that helps create a lasting impression and build relationships with your visitors.
What Is A Website Thank You Page?
A website thank you page is a page that your visitor sees right after they have completed a certain action on your website. This action could be filling out a contact form, signing up for a newsletter, or making a purchase. The thank you page usually contains a message thanking the visitor for completing the action and may also include a special offer or instructions on what to do next.
If you have been following along with my tutorials you will know that we are creating a newsletter for our website – the thank you page is the second step in this process.
Why is a Website Thank You Page Important?
A website thank you page is important for a couple of reasons. First, it lets the visitor know that their action was successful, which can increase their confidence in your brand. It also gives you an opportunity to promote your latest articles and social media profiles as well as giving you a great space to upsell or cross-sell products or services.
Tips & Tricks For Creating An Awesome Website Thank You Page
Now that you understand the importance of a website thank you page, here are some things you can include on your thank you page as well as tips and tricks to help you get started:
1. Thank You
This might seem like a no-brainer, but the first thing your website thank you page should do is say thank you. Make sure to express gratitude for the visitor’s action and let them know that you appreciate the time they have taken to engage with your business.
2. Provide Clear Next Steps
Your page should provide clear instructions on what the visitor should do next. This could be to check their email for a confirmation message, follow your social media accounts, or explore your website further. Make it as easy as possible for your visitor to know what to do next.
3. Offer a Special Promotion
A website thank you page is a great opportunity to offer a special promotion or discount to the visitor. This can encourage them to make another purchase or take another action on your website.
4. Include Social Sharing Buttons
Your page could also include social sharing buttons that allow your visitors to share your website with their friends and followers. This can help spread the word about your brand and increase the reach of your business.
5. Include Social Proof
Your thank you page is a great place to share some awesome customer reviews and testimonials!
6. Promote Your Latest Content
Your website thank you page can also be used to promote any of your latest marketing content such as articles, videos, podcasts, and images as well as products and services.
7. Get Feedback
Another great way of using your thank you page is by adding a survey. A survey that is short, quick, and fun can provide you with some awesome information about your website visitors and what they are looking for.
8. Refer A Friend
Imagine if you could leverage one client to gain even more clients! You can if you play your cards right. Why not offer your new signups something special if they refer a friend… a coupon, a discount, a free trial, or free content are all valid options.
Why Should You Create Your Own Thank You Page?
Often, when you sign up with an email marketing platform, they will have thank you pages already set up for you. This is great if you want to get something up quickly without too much effort.
However, creating your own thank you page has a couple of really great advantages:
- When you create your own thank you page you can design your page to look like the rest of your website so it creates consistency for your website visitors.
- Your domain name stays the same – no strange-looking domain names for your website!
- Often if you use an email marketing platform’s thank you page, your visitors will be moved away from your website. Creating your own thank you page ensures that your visitors remain on your website.
- You can control everything on your page. One of the biggest benefits of creating our own thank you pages is that you have full control over what your visitors see. And if something isn’t working, it is easy to tweak and customize your page until you get your desired outcome.
- Your visitors might not confirm their email addresses but they will see your thank you page so make it count 🙂
How To Create A Thank You Page
Creating a thank you page isn’t as tricky as you may think especially when you use the Gutenberg page editor combined with some clever, pre-built blocks!
Step 1 – Create A New Page
We need to create a new page for our thank you page. Go to your WordPress admin dashboard > Pages > Add New.
You will be taken to the Gutenberg page editor. Give your page a page title (will also be your page URL if you don’t change it).
Step 2 – Choose A Block
One of the easiest ways to create a thank you page is by using Gutenberg blocks and the Stackable design library which comes installed with the Blocksy theme.
If you aren’t using the Blocksy theme you can still use these blocks by installing the Stackable plugin.
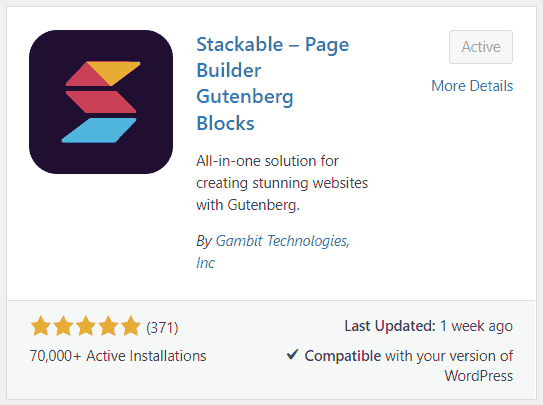
Go to your WordPress admin dashboard > Plugins > Add New. Search for Stackable. Install and activate the plugin. This is what the plugin looks like:
Once Stackable has been installed and activated you will see an additional option in the Gutenberg editor – Design Library.
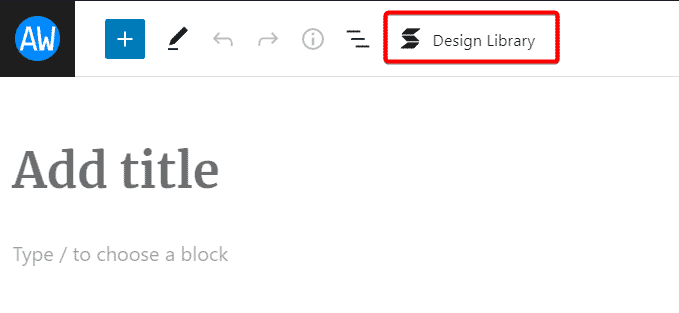
Click “Design Library” and then click the “Wireframe” tab (a wireframe is simply a couple of blocks that have been added together to create a pre-built layout).
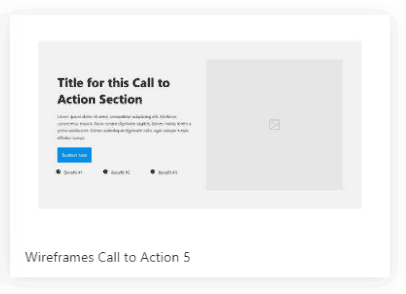
Scroll down until you find the “Wireframes Call To Action 5” wireframe.
Of course, there are lots of wireframe options that you can choose to completely customize your layout so go ahead and experiment until you find one that you like.
Step 3 – Edit Your Block & Add Images
Once you have chosen your wireframe, you will be taken back to the Gutenberg editor where you will see that your blocks have been added to your page.
You can now simply go ahead and edit all the elements for your thank you page! Here’s a very quick tutorial on how to edit a couple of the elements.
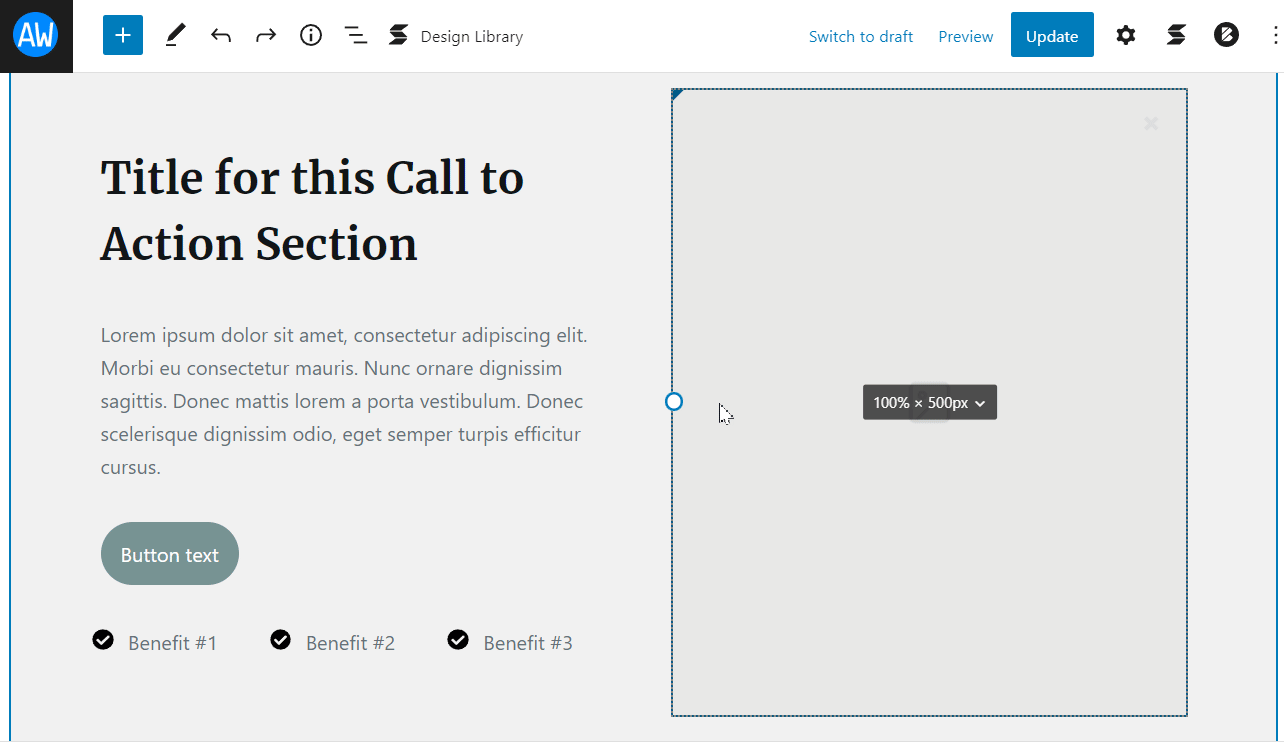
If you would like to you can add more blocks to your page until you have the perfect layout!
Step 4 – Save Your Page
When you are done, go ahead and save your page!
Take note of what the URL of your page is because we will be using this in our next tutorial.
Conclusion
Your website thank you page can be a handy tool when it comes to connecting with your website visitors and clients! It is an awesome way to reach out to your visitors in a meaningful way. I hope that this tutorial has helped you create an awesome thank you page for your visitors! If you are stuck or have any questions, let me know if the comments section below!