![]()
How To Install WordPress Using cPanel And Softaculous
In my last article, 11 Reasons Why You Should Use WordPress To Build Your Website, I went through all the reasons why WordPress is a great option for building a small business website.
In today’s article, I want to go through how you can easily install WordPress using cPanel.
Your first step is to log in to cPanel. You can do this quickly and easily by first going into your web host client dashboard. This is what it looks like for HostArmada.
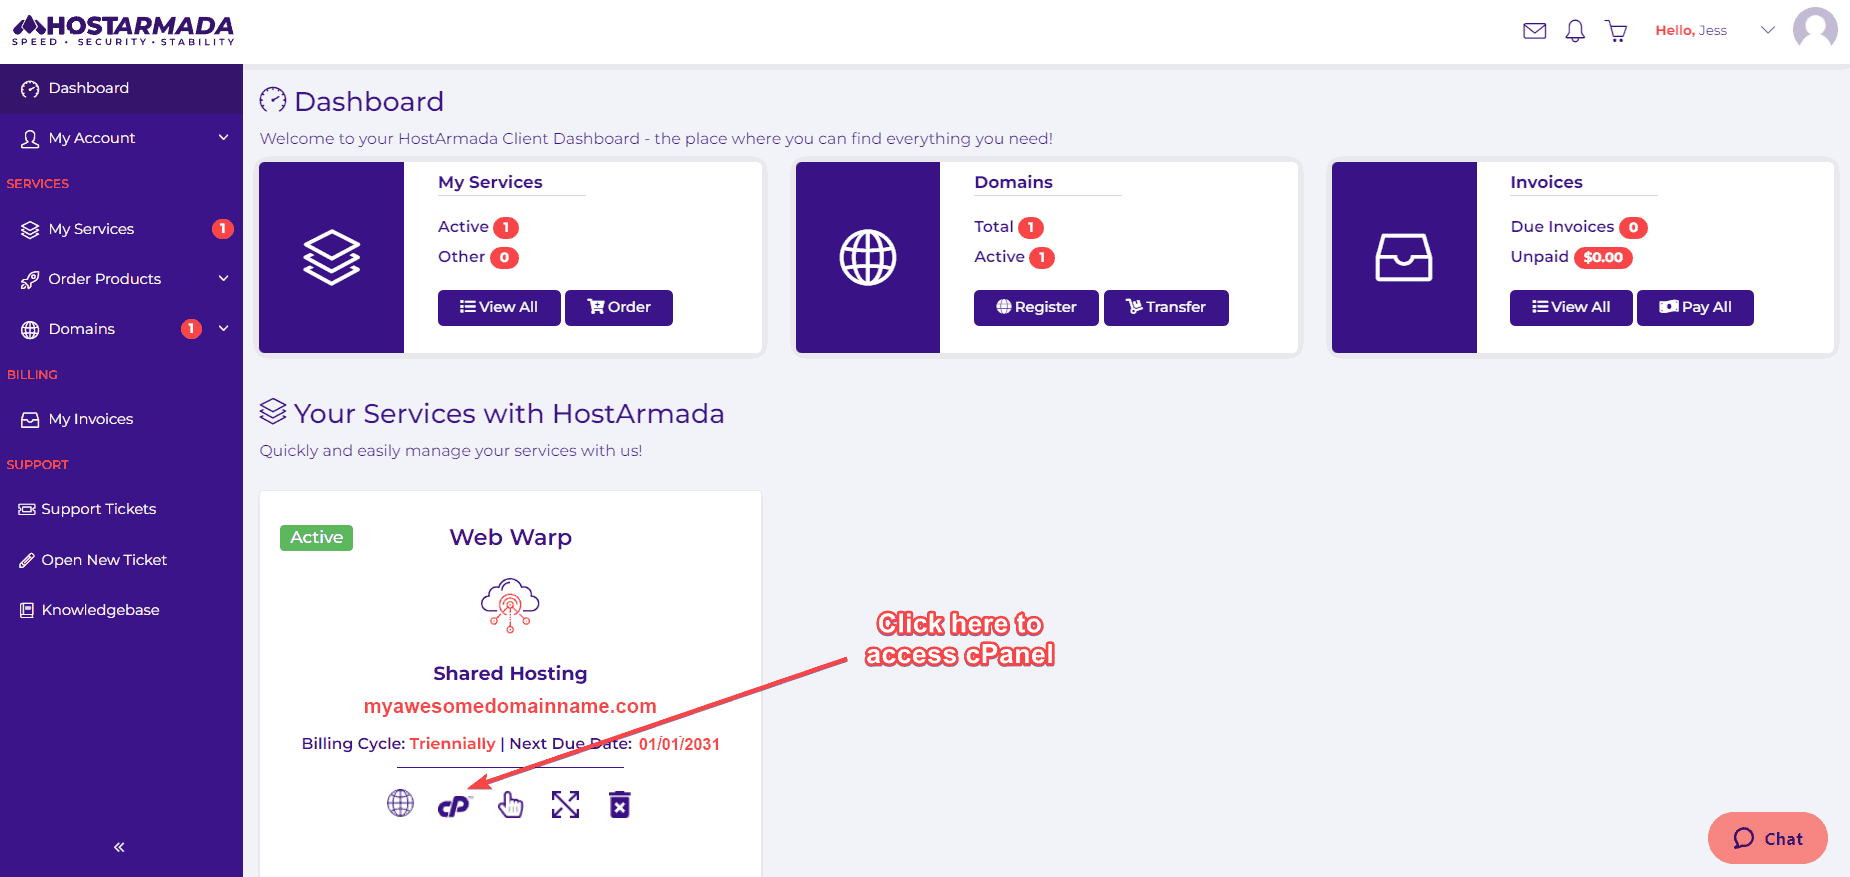
Alternatively, you can log directly into cPanel by checking the login details in the email you received from your host after signing up for your hosting package.
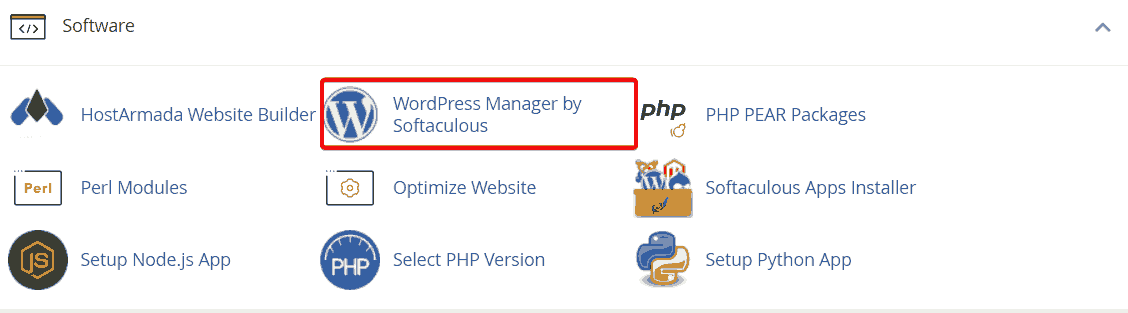
Once you are logged in to cPanel, you need to scroll down toward the bottom of the page until you reach the software section.
Select the “WordPress Manager by Softaculous” option. This is what it looks like:
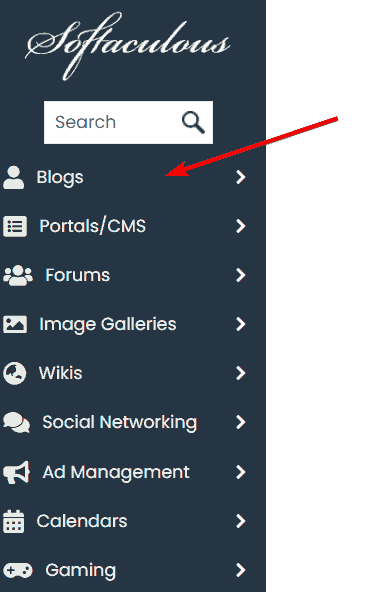
Inside Softaculous you will see a menu on the left-hand side of the screen. This menu contains all the software packages that you can install onto your website through Softaculous.
What Is Softaculous?
Softaculous is a library made up of a collection open source apps, scripts, and web applications that you can install on your website.
The term open source refers to something people can modify and share because its design is publicly accessible.
opensource.com
The best part about Softaculous is that, with just a couple of clicks, it is really easy to install a wide variety of software packages onto your website without any programming or development knowledge. There are over 20 categories of software that you can choose from so you really are spoilt for choice!
However, because we will be installing WordPress you don’t need to worry about any of these other options.
Let’s Install WordPress!
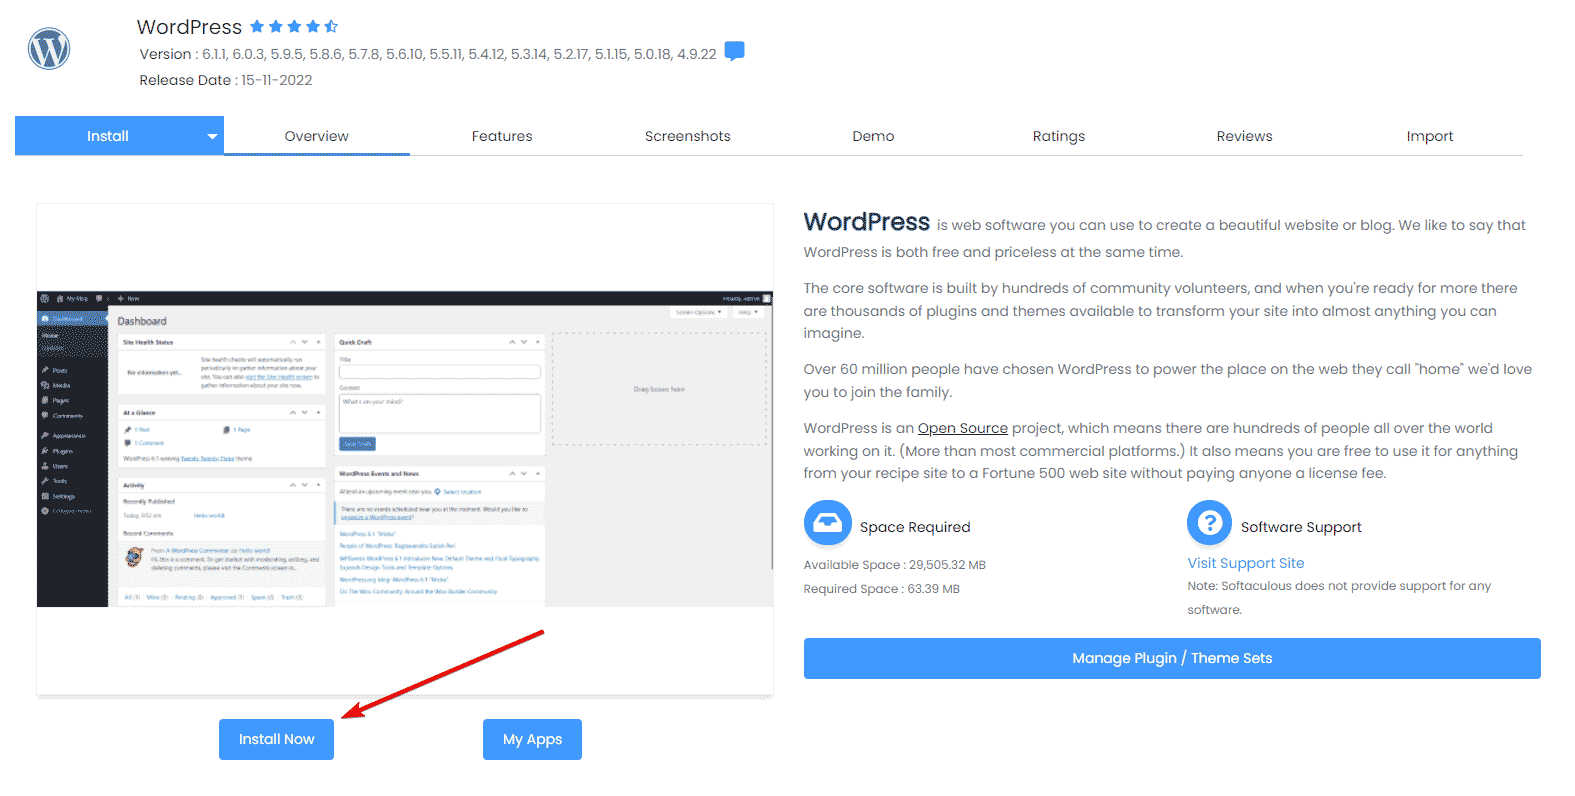
You should see the following screen – under the WordPress management heading, click the install button.

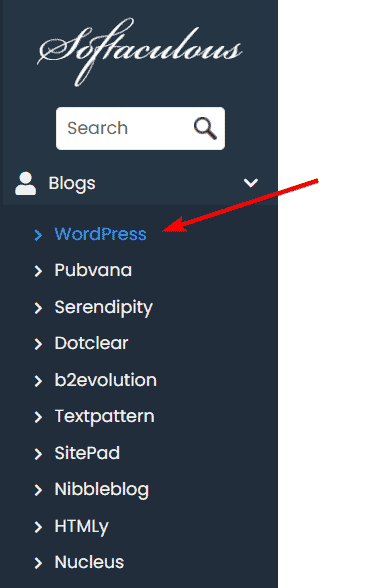
If your screen doesn’t look the same then you can install WordPress by working through the Softaculous menu on the left-hand side of the screen. Choose “Blogs“, choose “WordPress“, and click “Install“.
WordPress Setup
On the next screen, you will see the WordPress setup options.
Let’s work through each one…
Software Setup
There are a couple of options you need to set up here:
Choose Protocol
In the first drop-down box, you need to choose your URL protocol. If you click the drop-down you will see a couple of options:
| Options | What Your URL Will Look Like |
|---|---|
| http:// | http://myawesomewebsite.com |
| http://www. | http://www.myawesomewebsite.com |
| https:// | https://myawesomewebsite.com |
| https://www. | https://www.myawesomewebsite.com |
If you have SSL for your website you should select one of the two bottom options – https:// or https://www (note the “s” at the end of “http” – this means that your URL is secure).
If you have signed up for hosting through HostArmada, SSL is included for free.
Related: Learn more about SSL and why it is important for your website
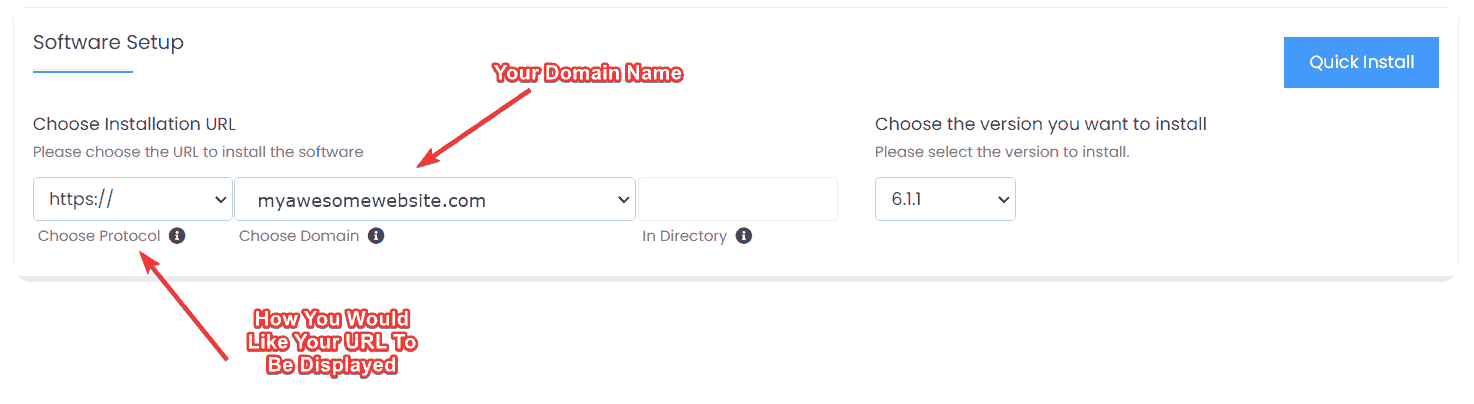
Choose Domain
In the next text box, you need to choose the domain that you would like to install WordPress on.
If you only have one domain it should be displayed automatically. If you can’t see your domain click the drop-down box to find it.
In Directory
Leave this option blank.
Choose The Version You Want To Install
This drop-down contains all the versions of WordPress that are available for you to install. Choose the latest version (it should default to the latest version automatically).
Site Settings
In the Site Settings section, fill out the first two text boxes with your site name and site description. Don’t worry, you will be able to change these later if you would like to.
Leave the “Enable Multisite (WPMU)” and “Disable WordPress Cron” checkboxes unselected.

Admin Account
In the admin account section, choose an admin username and an admin password.
Because the URL for WordPress admin is the same across all WordPress installations it is incredibly important that you choose a strong username and password so that it is difficult for hackers to access the back end of your website.
Admin Username
Don’t use “admin” as your default admin username. Rather try to use a username that is specific to you that no one would be able to guess.
Admin Password
Again, try to choose something that would be difficult for someone to guess for your Admin Password. You can use numbers, lowercase letters, uppercase letters, and symbols.
If you can’t think of anything, click the little blue key icon to the right of the textbox and you’ll be able to generate a random password.
The strength of your password will be displayed underneath the password block. The higher the better!
Admin Email
In the admin email block, you can enter any email that you would like to use. This can also be changed later if you would like to.
Choose Language
Select the language you would like to use for your WordPress site by clicking the drop-down box.

Select Plugin(s)
In the “Select Plugin(s)” section you can leave all these options unchecked. We will be adding plugins later.
Advanced Options
Leave all the options in the advanced options section on their default settings.
Select Theme
In the Select Themes section, choose the “Twenty Twenty-Three” option.
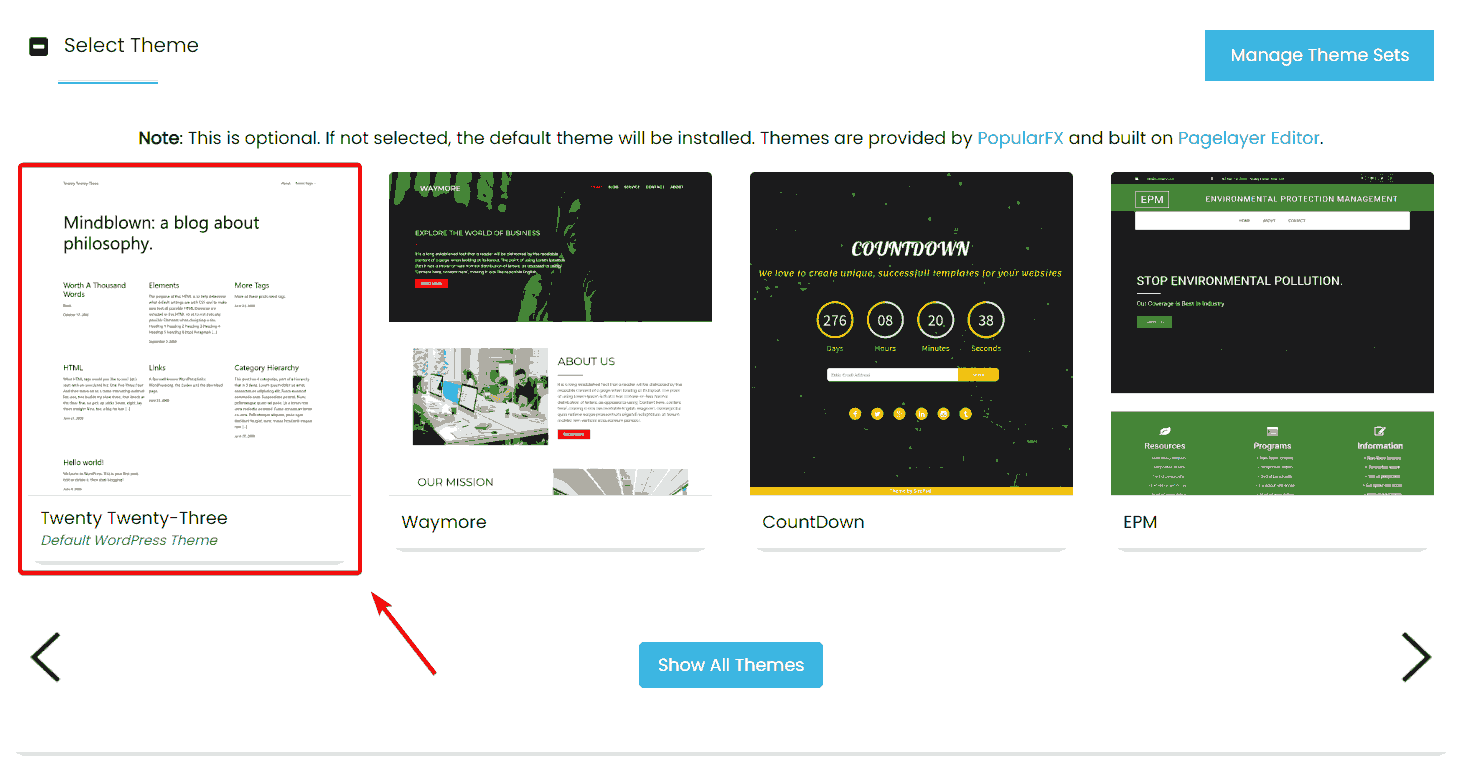
If you can’t see the “Twenty Twenty-Three” option you should be able to see either the “Twenty Twenty-Two“, “Twenty Twenty-One” or “Twenty Twenty” options. Pick any one of these, it isn’t important which one you choose.
They will look like this:
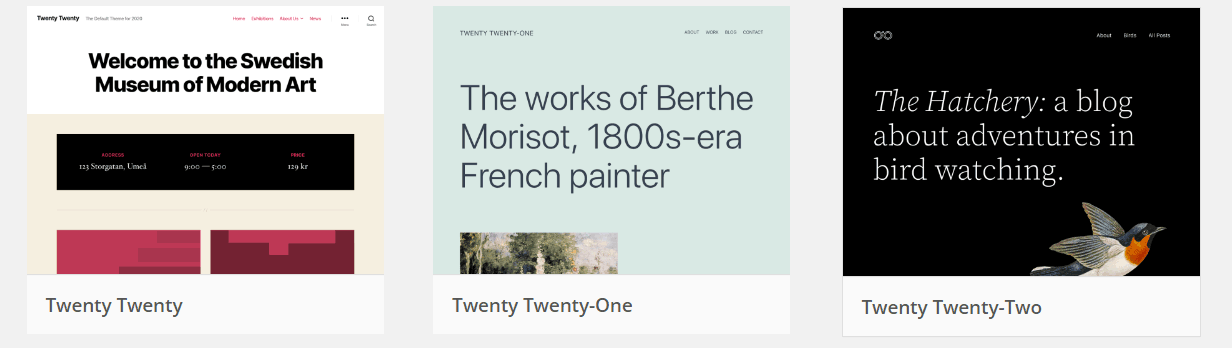
The Twenty Twenty themes are the default WordPress themes. Don’t worry if you don’t like the look of any of these themes, we will be changing the theme later.
Install
Once you have completed all the sections, click install. Don’t forget to add an email address so that your installation details can be sent to you.

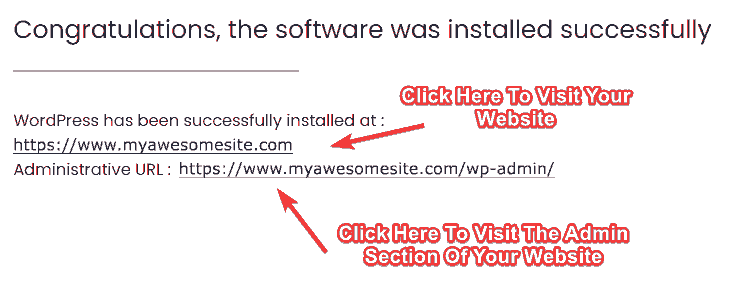
You’re Done!
Congratulations! You have just installed WordPress on your website. On the confirmation screen, you will see all the details of your installation.
The two URLs in the message will take you to your main website as well as to the admin section of your website.
Conclusion
That’s it! You have installed WordPress! Now we can move on to the fun stuff! And don’t worry if you don’t like the look of your website at the moment, we will be changing that by installing a new theme.